
Linux PXE + Kickstart 自动装机
2019-10-08 08:50:17来源:博客园 阅读 ()

Linux PXE + Kickstart 自动装机

大规模装机时,使用无人值守装机便可大大简便人工操作,提高效率。
PXE 网络安装
配置双网卡
- 这里
ens33为nat网络,ens37为仅主机网络,配置ens37
[root@localhost ~]# cd /etc/sysconfig/network-scripts/
[root@localhost network-scripts]# cp ifcfg-ens33 ifcfg-ens37
[root@localhost network-scripts]# vim ifcfg-ens37
TYPE=Ethernet
BOOTPROTO=static
DEVICE=ens37
ONBOOT=yes
IPADDR=192.168.100.100
NETMASK=255.255.255.0
GATEWAY=192.168.100.1- 重启网络服务
[root@localhost ~]# service network restart
Restarting network (via systemctl): [ OK ]- 查看网卡地址
[root@localhost ~]# ifconfig ens33
ens33: flags=4163<UP,BROADCAST,RUNNING,MULTICAST>  mtu 1500
        inet 192.168.28.128  netmask 255.255.255.0  broadcast 192.168.28.255
        inet6 fe80::605e:3c48:bafd:e550  prefixlen 64  scopeid 0x20<link>
        ether 00:0c:29:bc:ab:96  txqueuelen 1000  (Ethernet)
        RX packets 635342  bytes 935571060 (892.2 MiB)
        RX errors 0  dropped 0  overruns 0  frame 0
        TX packets 288265  bytes 17505470 (16.6 MiB)
        TX errors 0  dropped 0 overruns 0  carrier 0  collisions 0
[root@localhost ~]# ifconfig ens37
ens37: flags=4163<UP,BROADCAST,RUNNING,MULTICAST> mtu 1500
inet 192.168.100.100 netmask 255.255.255.0 broadcast 192.168.100.255
inet6 fe80::20c:29ff:febc:aba0 prefixlen 64 scopeid 0x20<link>
ether 00:0c:29:bc:ab:a0 txqueuelen 1000 (Ethernet)
RX packets 1514 bytes 461770 (450.9 KiB)
RX errors 0 dropped 0 overruns 0 frame 0
TX packets 186 bytes 31726 (30.9 KiB)
TX errors 0 dropped 0 overruns 0 carrier 0 collisions 0DHCP 服务
- 安装
DHCP软件包
[root@localhost ~]# yum install dhcp -y- 编辑
DHCP配置文件
[root@localhost ~]# cp /usr/share/doc/dhcp-4.2.5/dhcpd.conf.example /etc/dhcp/dhcpd.conf
cp: overwrite ‘/etc/dhcp/dhcpd.conf’? y
[root@localhost ~]# vim /etc/dhcp/dhcpd.conf - 在
27-40行配置网段信息。
subnet 192.168.100.0 netmask 255.255.255.0 {
  range 192.168.100.20 192.168.100.50;
  option routers 192.168.100.100;
  option domain-name-servers 114.114.114.114;
  next-server 192.168.100.100;
  filename "pxelinux.0";
}- 安装
syslinux软件包
[root@localhost ~]# yum install syslinux -y- 查找
pxelinux.0引导程序
[root@localhost ~]# rpm -ql syslinux | grep pxelinux.0
/usr/share/syslinux/gpxelinux.0
/usr/share/syslinux/pxelinux.0
TFTP 服务
- 安装
tftp-server软件包
[root@localhost ~]# yum install tftp-server -y- 查看
tftp-server文件列表
[root@localhost ~]# rpm -ql tftp-server
/etc/xinetd.d/tftp
/usr/lib/systemd/system/tftp.service
/usr/lib/systemd/system/tftp.socket
/usr/sbin/in.tftpd
/usr/share/doc/tftp-server-5.2
/usr/share/doc/tftp-server-5.2/CHANGES
/usr/share/doc/tftp-server-5.2/README
/usr/share/doc/tftp-server-5.2/README.security
/usr/share/man/man8/in.tftpd.8.gz
/usr/share/man/man8/tftpd.8.gz
/var/lib/tftpboot- 复制引导程序
pxelinux.0至tftp站点下
[root@localhost ~]# cp /usr/share/syslinux/pxelinux.0 /var/lib/tftpboot/- 编辑
tftp配置文件
[root@localhost ~]# vim /etc/xinetd.d/tftp - 编辑第
14行,yes改为no,开启tftp功能
disable = noFTP 服务
- 安装 vsftp 软件包
[root@localhost ~]# yum install vsftpd -y- 挂载镜像文件
[root@localhost ~]# mkdir /var/ftp/centos7
[root@localhost ~]# mount /dev/cdrom /var/ftp/centos7/
mount: /dev/sr0 is write-protected, mounting read-only
[root@localhost ~]# df -hT
Filesystem     Type      Size  Used Avail Use% Mounted on
/dev/sda2      xfs        20G  4.3G   16G  22% /
devtmpfs       devtmpfs  1.9G     0  1.9G   0% /dev
tmpfs          tmpfs     1.9G     0  1.9G   0% /dev/shm
tmpfs          tmpfs     1.9G  9.0M  1.9G   1% /run
tmpfs          tmpfs     1.9G     0  1.9G   0% /sys/fs/cgroup
/dev/sda5      xfs        10G   37M   10G   1% /home
/dev/sda1      xfs       2.0G  174M  1.9G   9% /boot
tmpfs          tmpfs     378M   40K  378M   1% /run/user/0
/dev/sr0 iso9660 4.3G 4.3G 0 100% /var/ftp/centos7- 复制系统初始化文件
initrd.img和压缩内核vmlinuz至tftp站点下
[root@localhost ~]# cd /var/ftp/centos7/images/pxeboot/[root@localhost pxeboot]# cp initrd.img vmlinuz /var/lib/tftpboot/- 创建启动菜单
default
[root@localhost ~]# mkdir /var/lib/tftpboot/pxelinux.cfg
[root@localhost ~]# vim /var/lib/tftpboot/pxelinux.cfg/default
default auto
prompt 1

label auto
        kernel vmlinuz
        append initrd=initrd.img method=ftp://192.168.100.100/centos7

label linux text
        kernel vmlinuz
        append text initrd=initrd.img method=ftp://192.168.100.100/centos7

label linux rescue
        kernel vmlinuz
append rescue initrd=initrd.img method=ftp://192.168.100.100/centos7- 查看所需文件是否齐全
[root@localhost ~]# tree /var/lib/tftpboot/
/var/lib/tftpboot/
├── initrd.img
├── pxelinux.0
├── pxelinux.cfg
│?? └── default
└── vmlinuz

1 directory, 4 files- 启动所有相关服务
[root@localhost ~]# systemctl enable dhcpd
Created symlink from /etc/systemd/system/multi-user.target.wants/dhcpd.service to /usr/lib/systemd/system/dhcpd.service.
[root@localhost ~]# systemctl enable tftp
Created symlink from /etc/systemd/system/sockets.target.wants/tftp.socket to /usr/lib/systemd/system/tftp.socket.
[root@localhost ~]# systemctl enable vsftpd
Created symlink from /etc/systemd/system/multi-user.target.wants/vsftpd.service to /usr/lib/systemd/system/vsftpd.service.
[root@localhost ~]# systemctl start dhcpd
[root@localhost ~]# systemctl start tftp
[root@localhost ~]# systemctl start vsftpd
关闭防火墙
[root@localhost ~]# systemctl stop firewalld
[root@localhost ~]# setenforce 0
这一步做完已经可以使用网络引导装机了,但是需要手动选择相关安装配置。
PXE 装机验证
- 使用网络引导启动,此界面回车后可加载相关文件进行安装
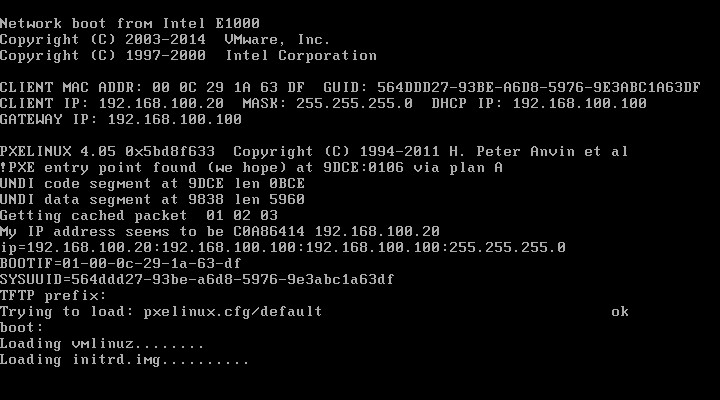
kickstart 无人值守安装
安装软件包
[root@localhost ~]# yum install system-config-kickstart -y启动程序
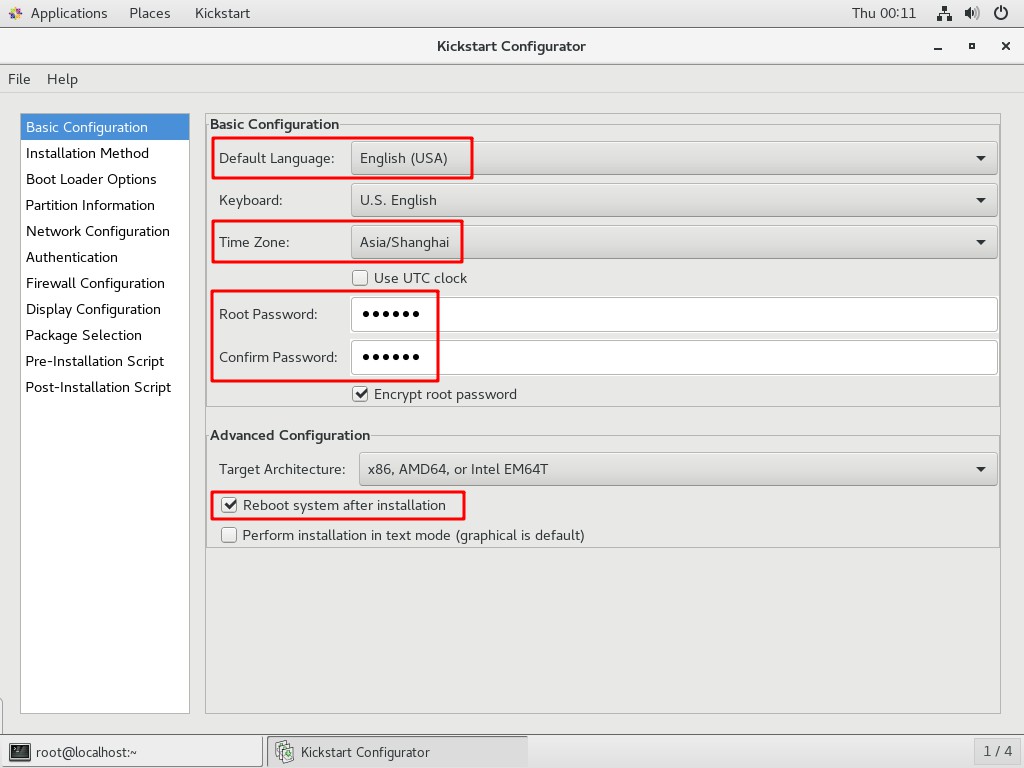
[root@localhost ~]# system-config-kickstart创建自动应答文件
- 基本配置
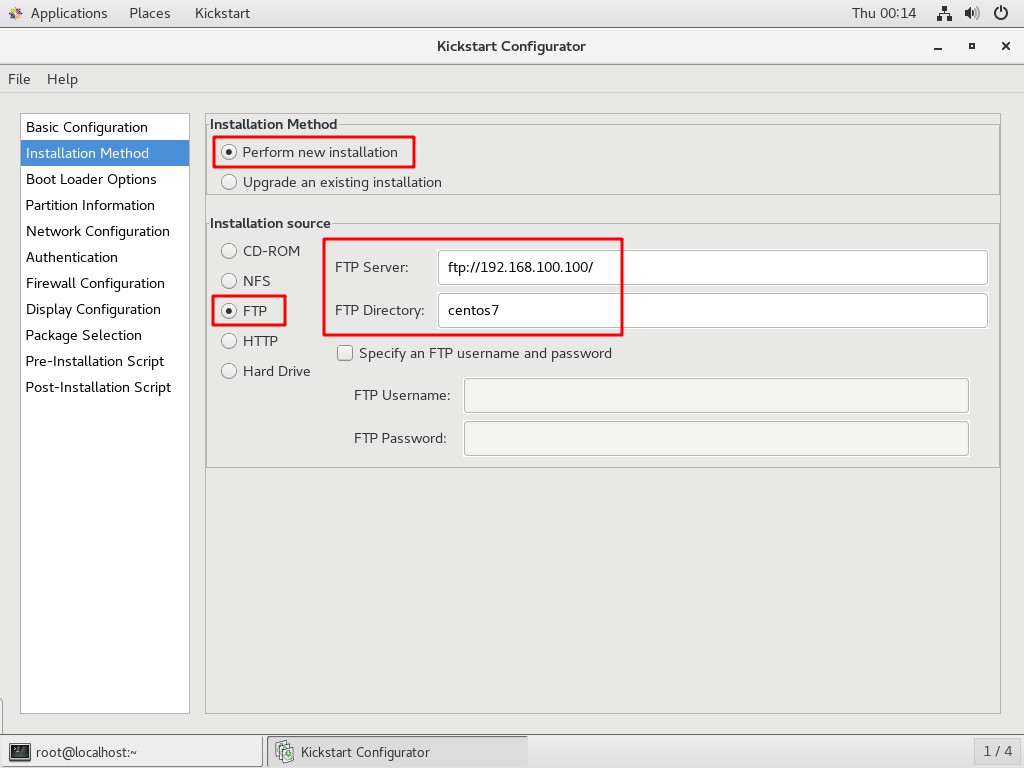
- 安装方法
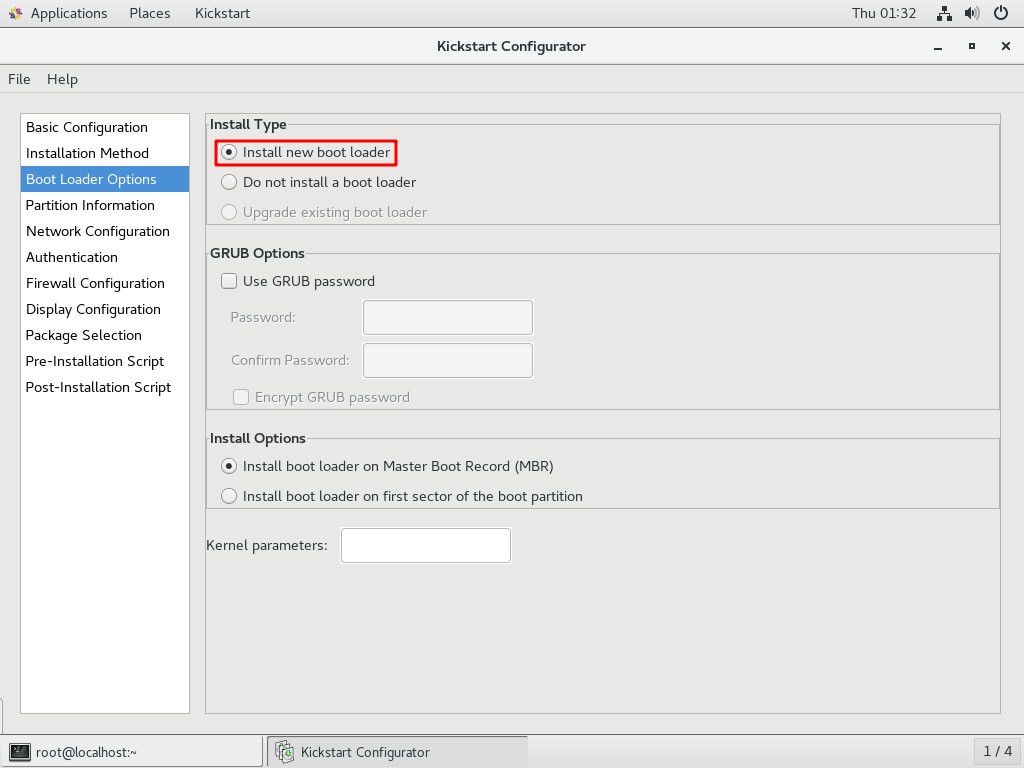
- 引导装载程序选项
- 分区信息
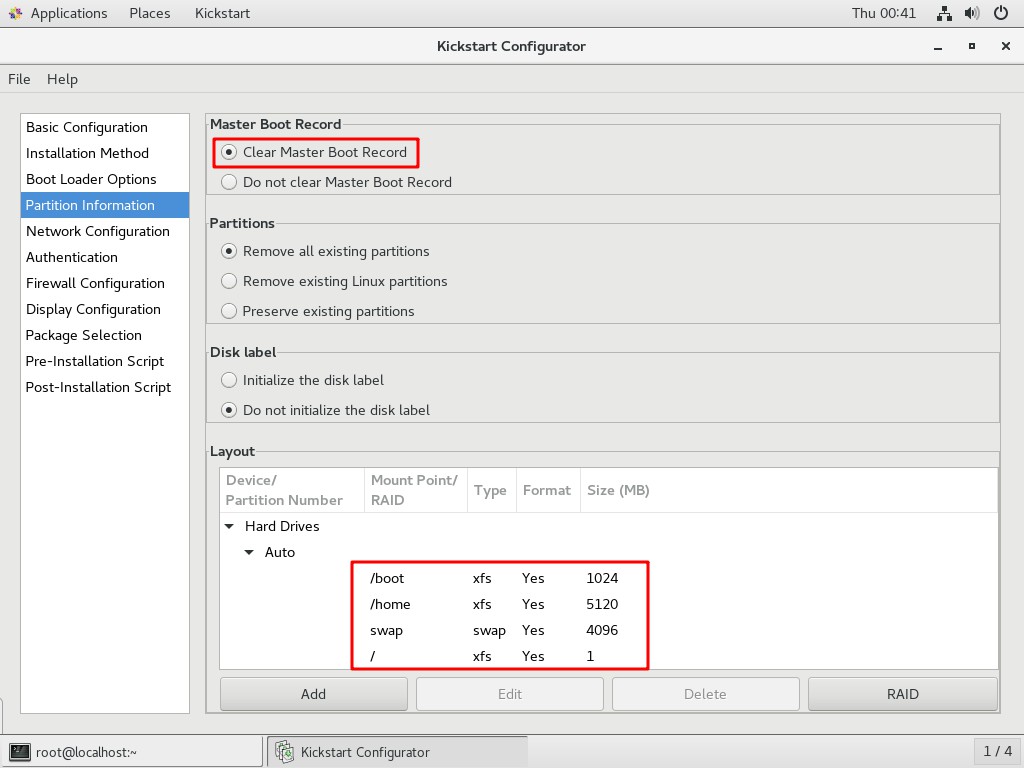
- 分区
boot信息

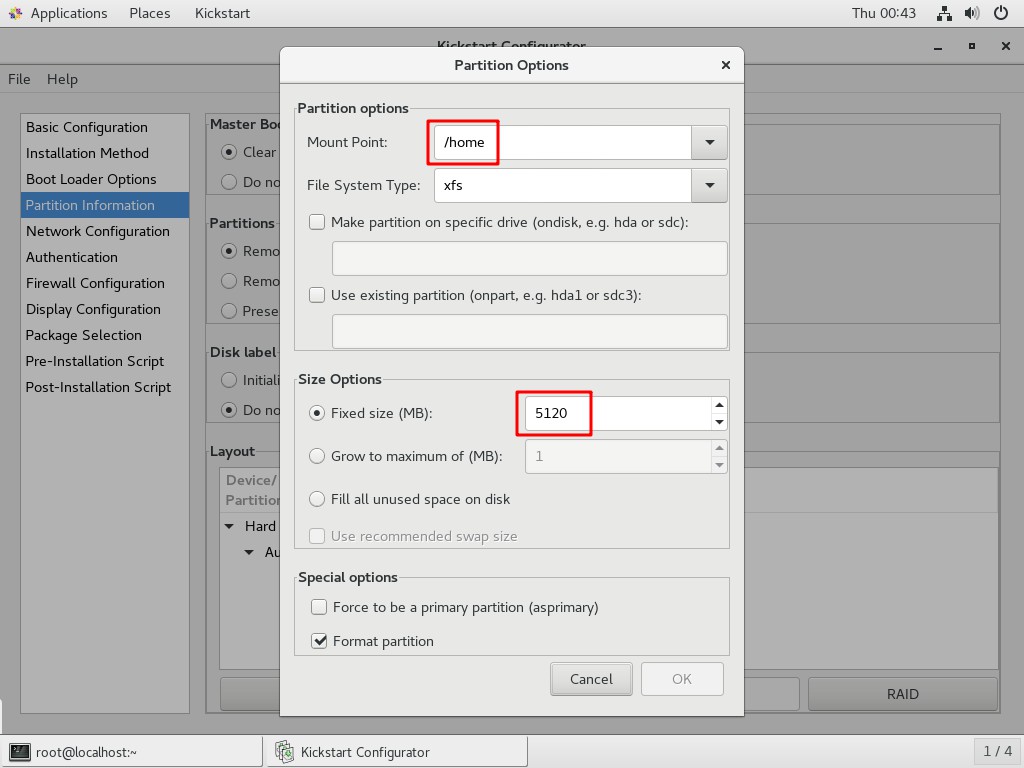
- 分区
home信息
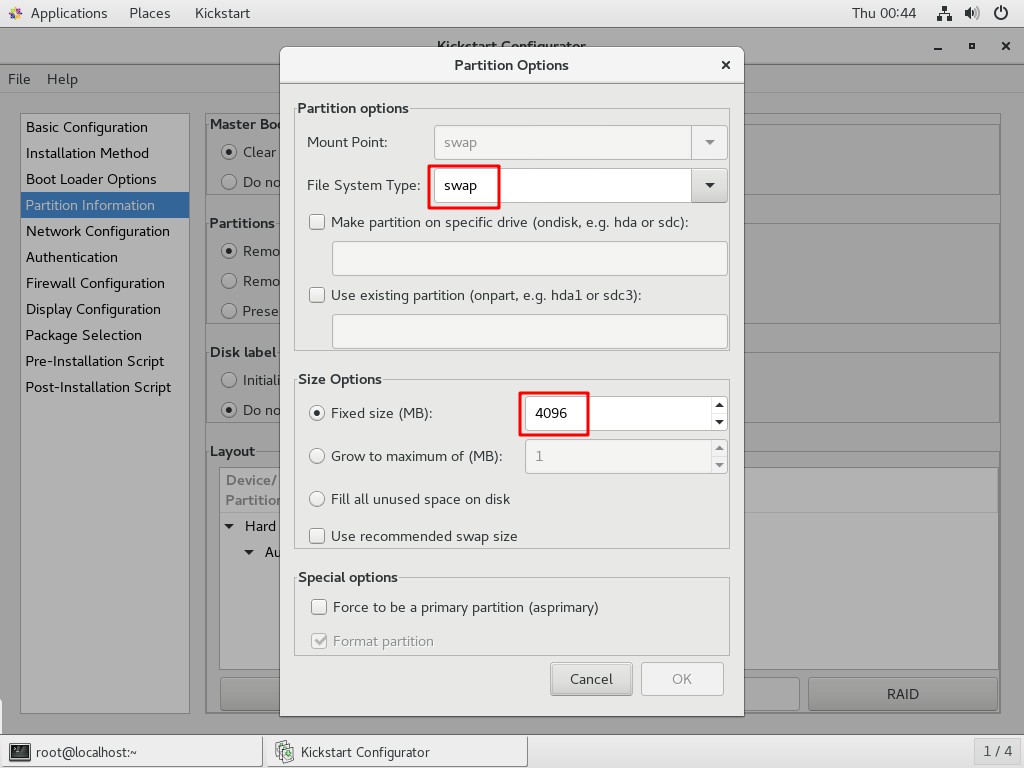
- 分区
swap信息
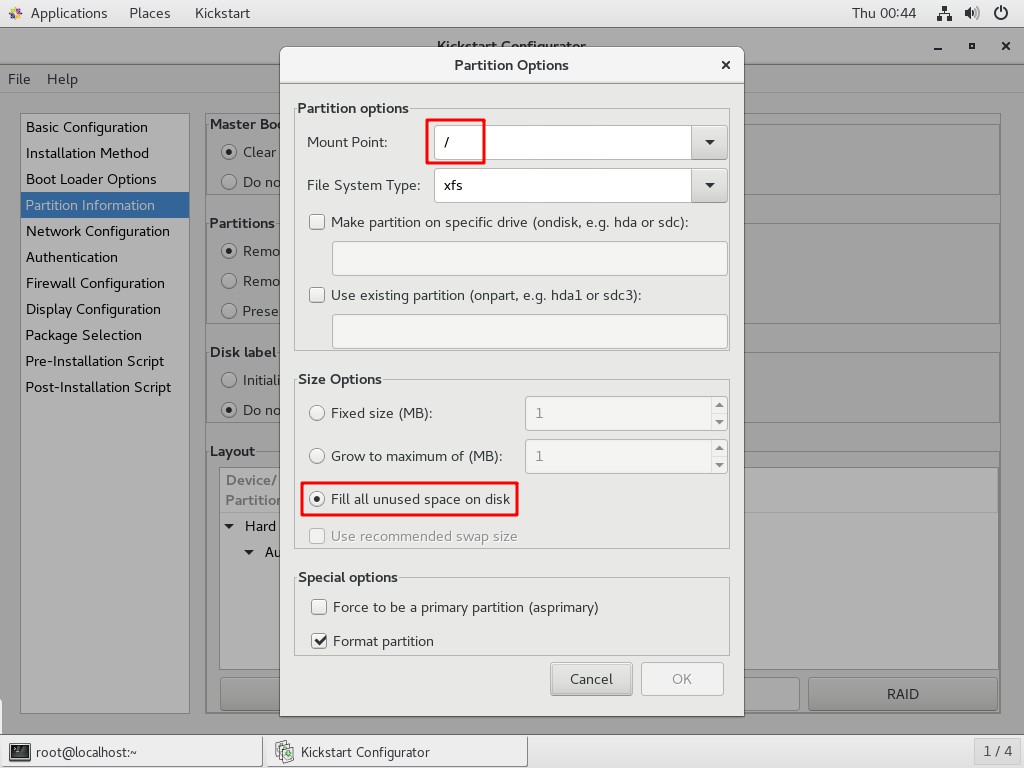
- 分区
/信息
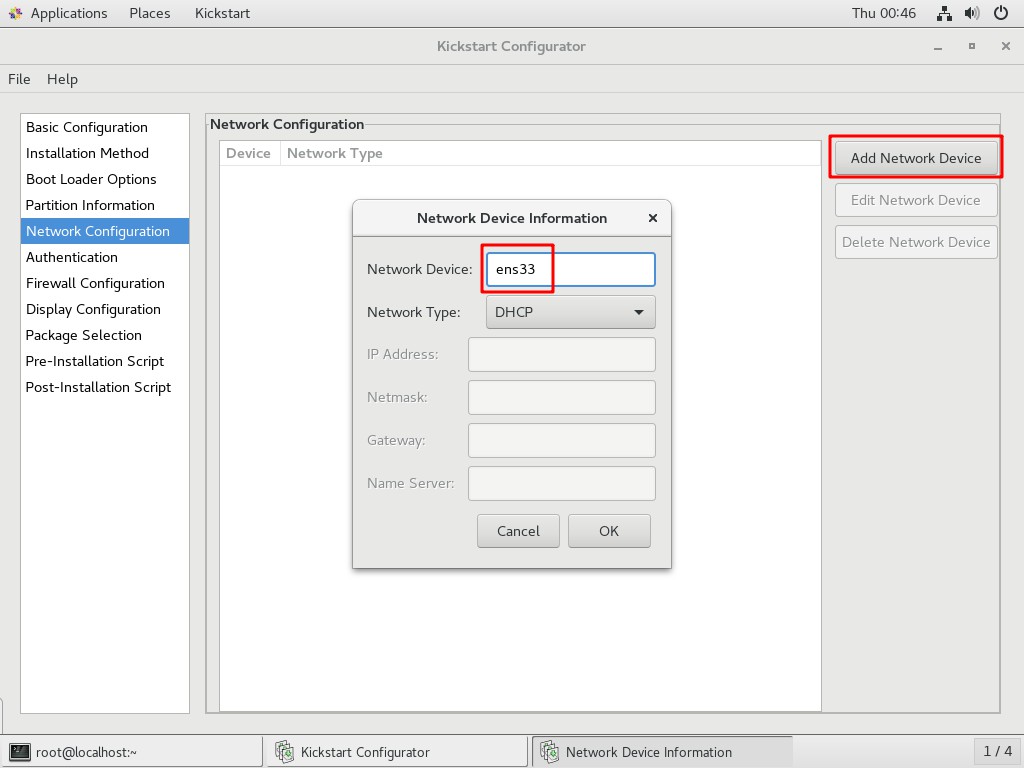
- 网络配置
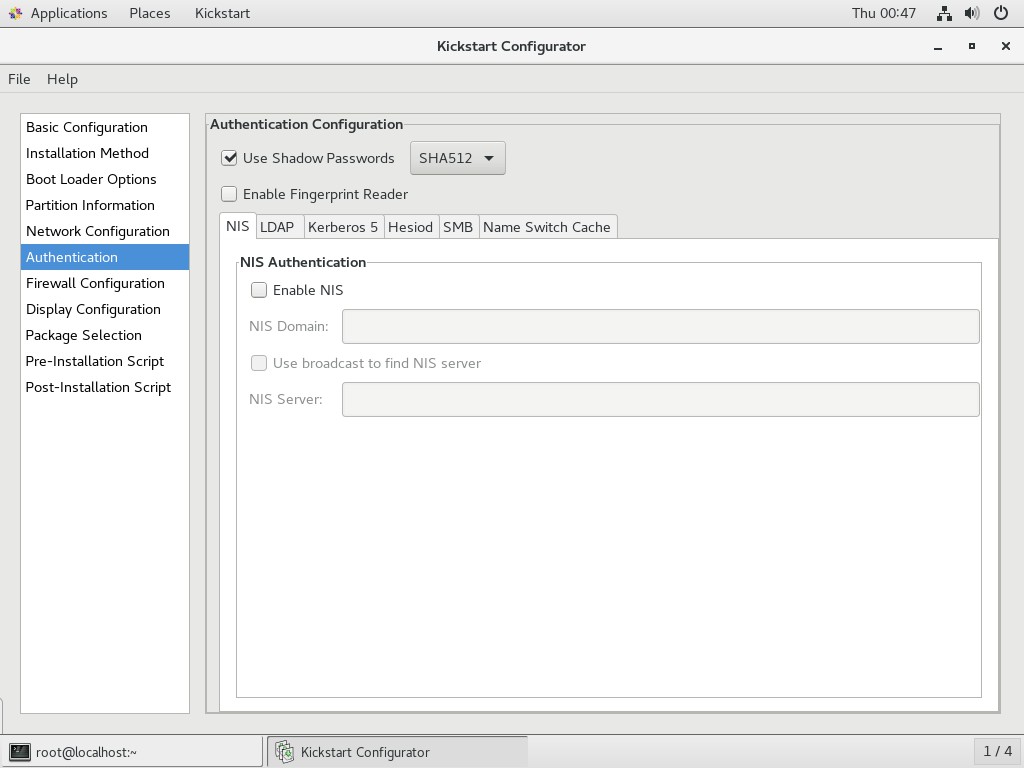
- 验证
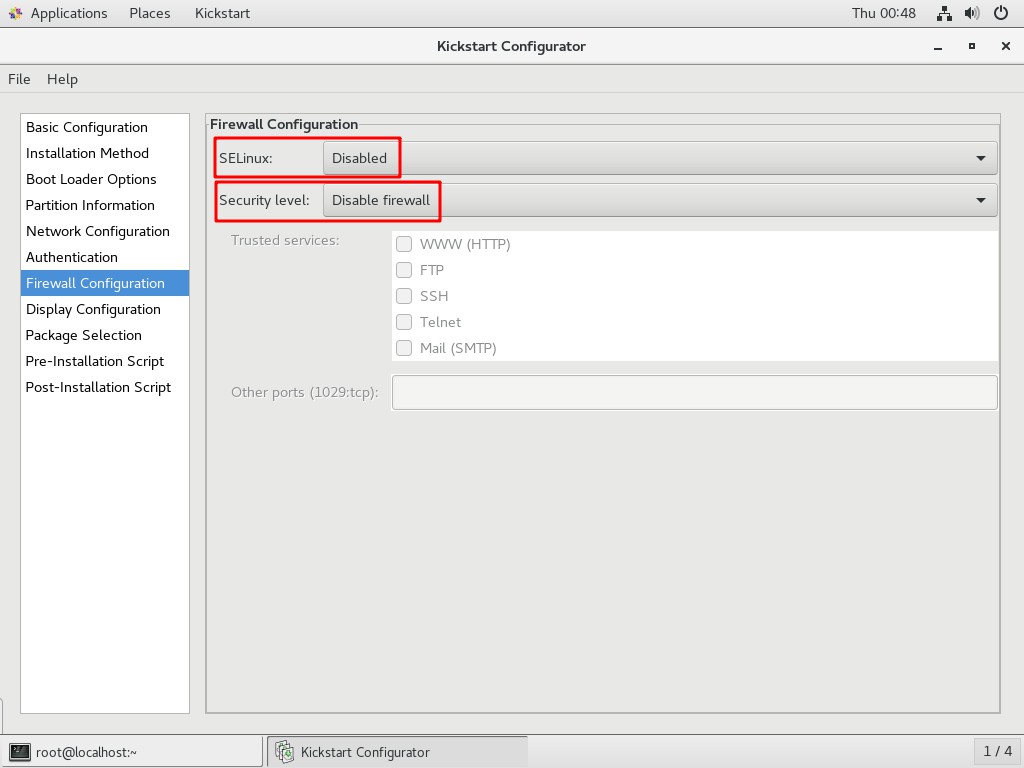
- 防火墙配置
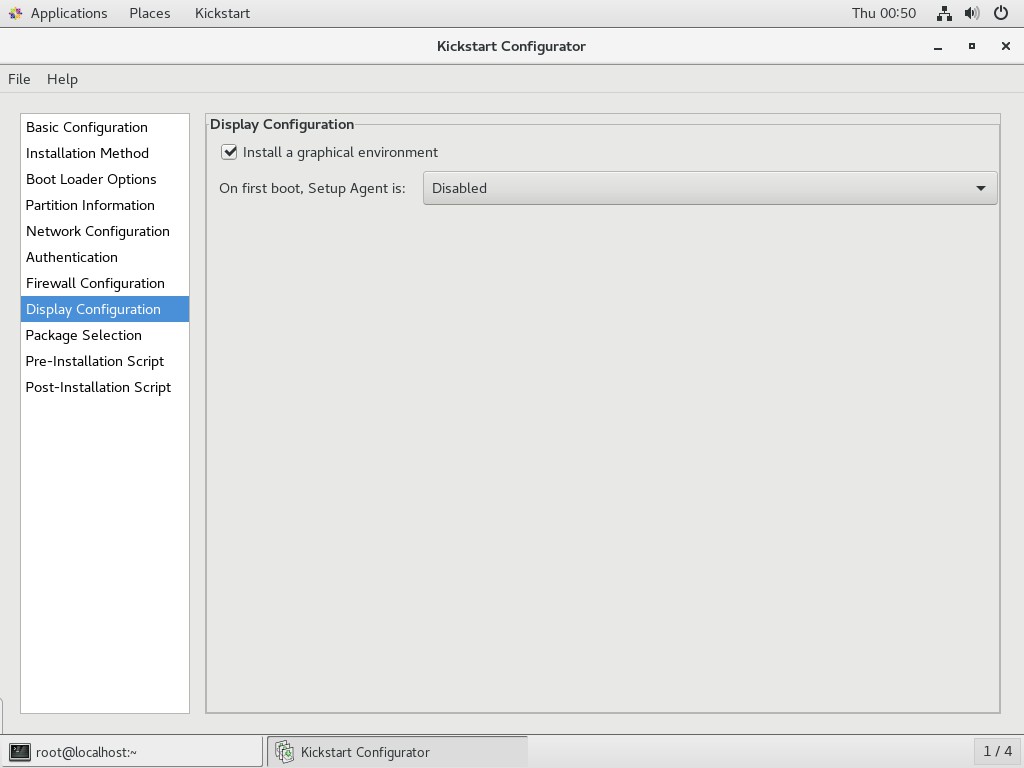
- 显示配置
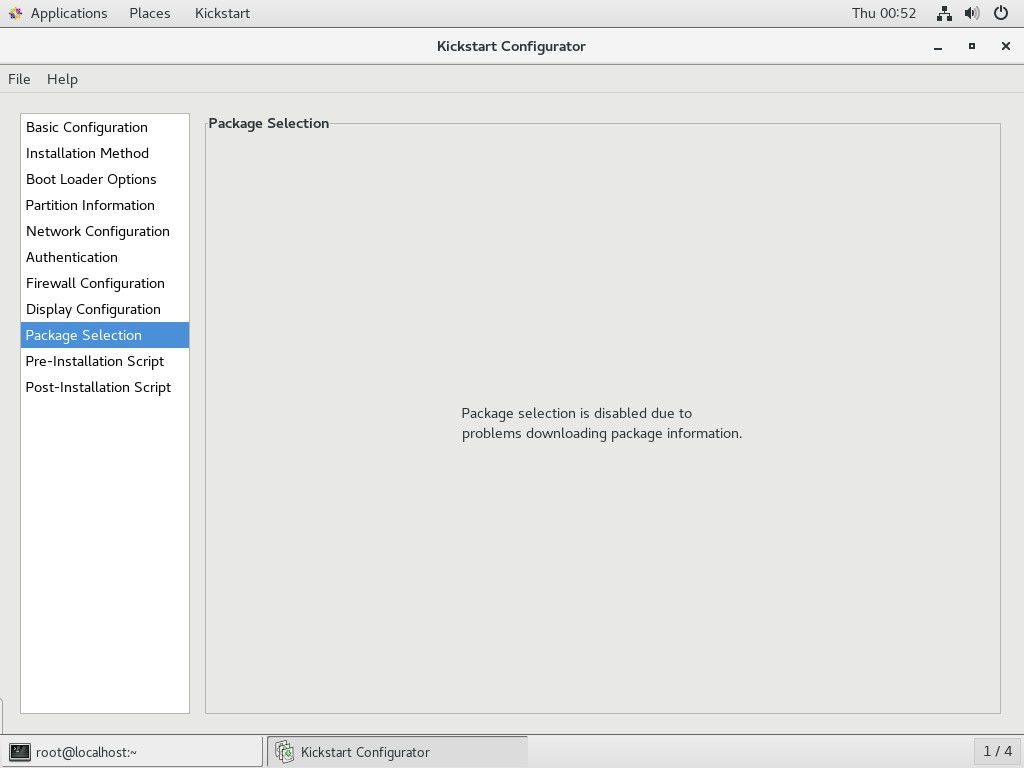
- 软件包选择
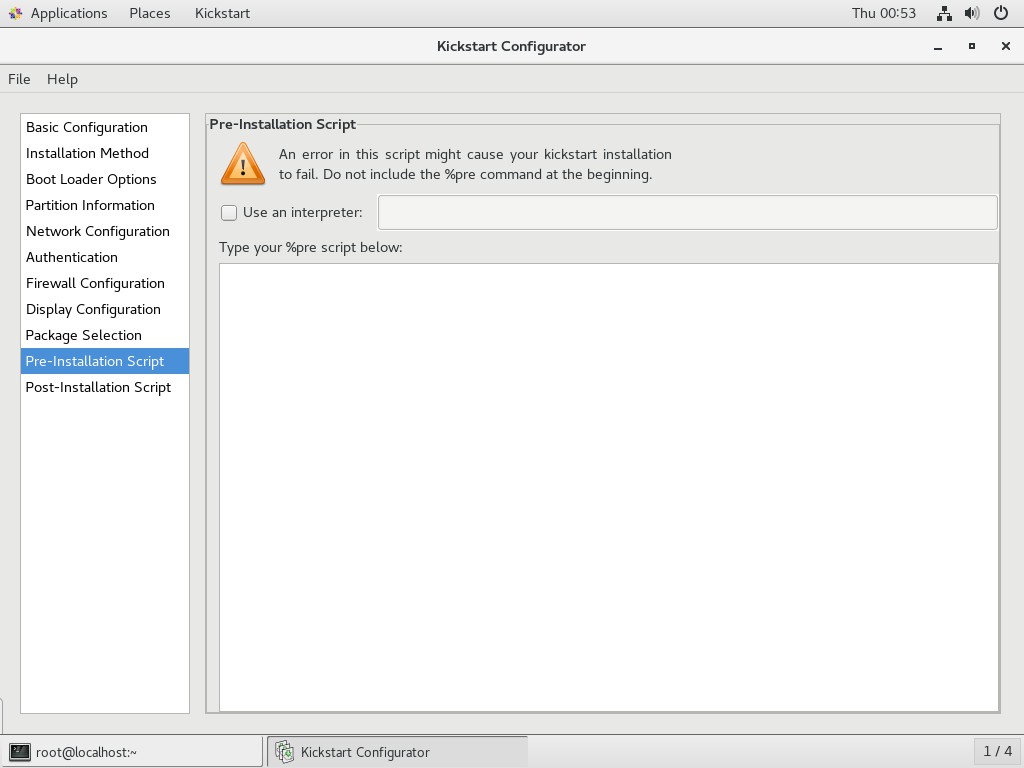
- 预安装脚本
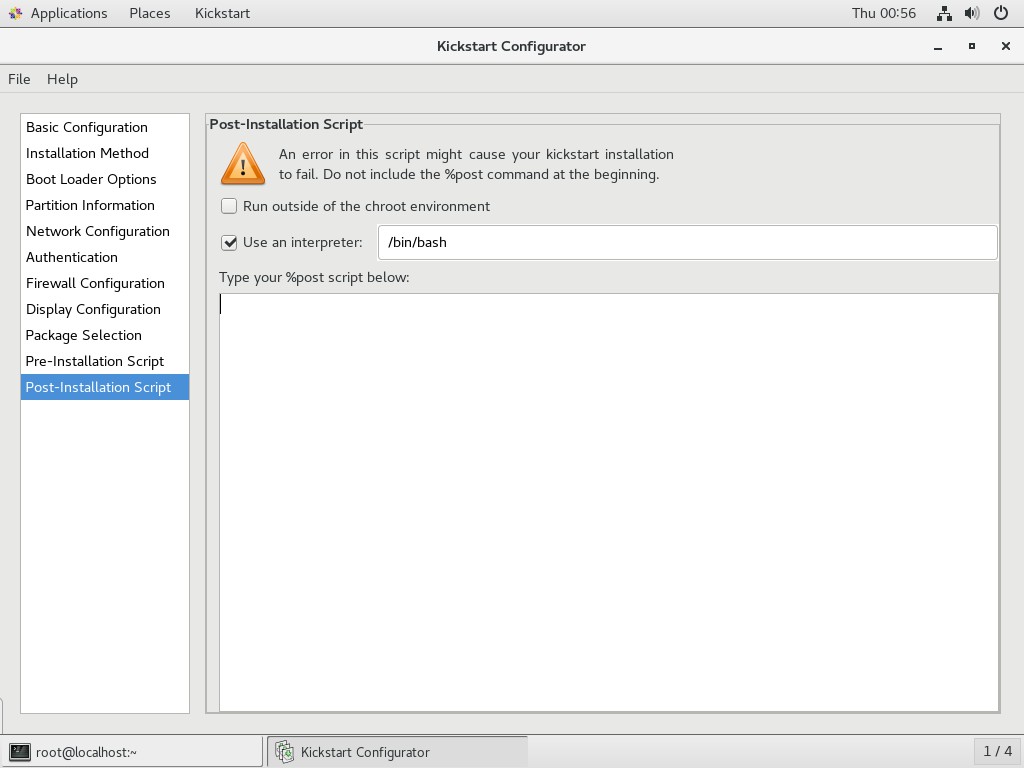
- 安装后脚本
- 保存应答文件至
/var/ftp
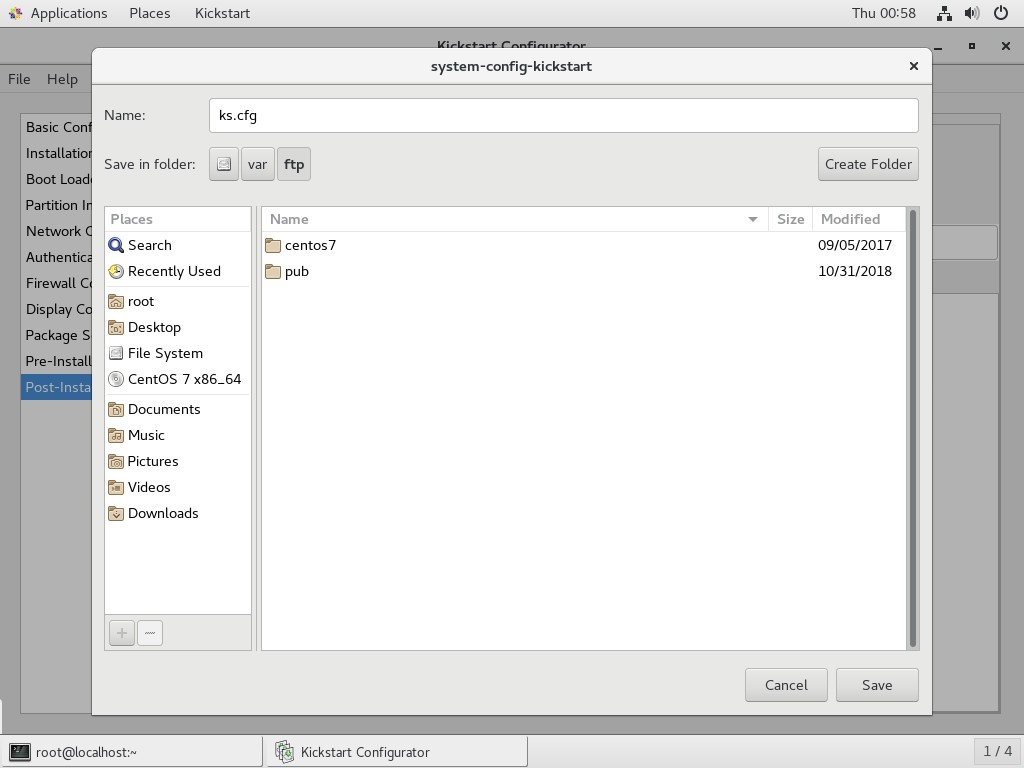
编辑 ks.cfg
[root@localhost ~]# ls /var/ftp/
centos7 ks.cfg pub- 从
/root/anaconda-ks.cfg中复制需要安装的软件包的参数
[root@localhost ~]# vim /root/anaconda-ks.cfg %packages
@^gnome-desktop-environment
@base
@core
@desktop-debugging
@dial-up
@directory-client
@fonts
@gnome-desktop
@guest-agents
@guest-desktop-agents
@input-methods
@internet-browser
@java-platform
@multimedia
@network-file-system-client
@networkmanager-submodules
@print-client
@x11
chrony
kexec-tools
%end- 将安装包参数粘贴到
ks.cfg文件最后
[root@localhost ~]# vim /var/ftp/ks.cfg #platform=x86, AMD64, or Intel EM64T
#version=DEVEL
# Install OS instead of upgrade
install
# Keyboard layouts
keyboard 'us'
# Root password
rootpw --iscrypted $1$MzI8tkpP$whWLRJqNdsvOMTgOewQ0i1
# Use network installation
url --url="ftp://192.168.100.100/centos7"
# System language
lang en_US
# Firewall configuration
firewall --disabled
# System authorization information
auth --useshadow --passalgo=sha512
# Use graphical install
graphical
firstboot --disable
# SELinux configuration
selinux --disabled
# Network information
network --bootproto=dhcp --device=ens33
# Reboot after installation
reboot
# System timezone
timezone Asia/Shanghai
# System bootloader configuration
bootloader --location=mbr
# Clear the Master Boot Record
zerombr
# Partition clearing information
clearpart --all
# Disk partitioning information
part /boot --fstype="xfs" --size=1024
part /home --fstype="xfs" --size=5120
part swap --fstype="swap" --size=4096
part / --fstype="xfs" --grow --size=1
%packages
@^gnome-desktop-environment
@base
@core
@desktop-debugging
@dial-up
@directory-client
@fonts
@gnome-desktop
@guest-agents
@guest-desktop-agents
@input-methods
@internet-browser
@java-platform
@multimedia
@network-file-system-client
@networkmanager-submodules
@print-client
@x11
chrony
kexec-tools

%end编辑启动菜单
[root@localhost ~]# vim /var/lib/tftpboot/pxelinux.cfg/default default auto
prompt 1
label auto
kernel vmlinuz
append initrd=initrd.img method=ftp://192.168.100.100/centos7 ks=ftp://192.168.100.100/ks.cfg
label linux text
kernel vmlinuz
append text initrd=initrd.img method=ftp://192.168.100.100/centos7
label linux rescue
kernel vmlinuz
append rescue initrd=initrd.img method=ftp://192.168.100.100/centos7现在从网络引导启动后就可以自动完成安装,不需要手动操作,完成无人值守安装。
原文链接:https://www.cnblogs.com/llife/p/11632933.html
如有疑问请与原作者联系
标签:
版权申明:本站文章部分自网络,如有侵权,请联系:west999com@outlook.com
特别注意:本站所有转载文章言论不代表本站观点,本站所提供的摄影照片,插画,设计作品,如需使用,请与原作者联系,版权归原作者所有

上一篇:Linux 部署 YUM 仓库
下一篇:tcpdump命令及输出详解
- Linux系统如何设置开机自动运行脚本? 2020-06-11
- Linux指令和shell脚本 2020-06-11
- 适合开发者的最佳Linux发行版 2020-06-11
- RAID 1 软件实现(Linux 系统) 2020-06-10
- linux各级目录 2020-06-08
IDC资讯: 主机资讯 注册资讯 托管资讯 vps资讯 网站建设
网站运营: 建站经验 策划盈利 搜索优化 网站推广 免费资源
网络编程: Asp.Net编程 Asp编程 Php编程 Xml编程 Access Mssql Mysql 其它
服务器技术: Web服务器 Ftp服务器 Mail服务器 Dns服务器 安全防护
软件技巧: 其它软件 Word Excel Powerpoint Ghost Vista QQ空间 QQ FlashGet 迅雷
网页制作: FrontPages Dreamweaver Javascript css photoshop fireworks Flash
