
针对CCTV摄像头的扫描爆破工具 :Cameradar
2019-11-13 16:01:19来源:博客园 阅读 ()
 针对CCTV摄像头的扫描爆破工具 :Cameradar
针对CCTV摄像头的扫描爆破工具 :Cameradar

- 可以检测任何可访问的目标设备并扫描出开放的RTSP主机。
- 检测正在传输监控数据的设备型号。
- 内置字典自动化渗透爆破账号密码和目标流路径。
- 可以很方便的批量检测摄像头设备的弱口令。
- 可以自定义爆破的账密字典和目标流路径,可以检测的不同的摄像头设备来改变字典。
[root@localhost docker_test]# uname -a
Linux bogon 3.10.0-862.el7.x86_64 #1 SMP Fri Apr 20 16:44:24 UTC 2018 x86_64 x86_64 x86_64 GNU/Linux
[root@localhost docker_test]#
一、使用yum包管理器将软件包升级到最新。
[root@localhost docker_test]# yum update
Loaded plugins: fastestmirror, langpacks
Determining fastest mirrors
* base: mirrors.huaweicloud.com
* extras: mirrors.tuna.tsinghua.edu.cn
* updates: mirrors.huaweicloud.com
base                                                     | 3.6 kB     00:00
extras                                                   | 2.9 kB     00:00
updates                                                  | 2.9 kB     00:00
(1/4): base/7/x86_64/group_gz                              | 165 kB   00:00
(2/4): extras/7/x86_64/primary_db                          | 153 kB   00:00
(3/4): updates/7/x86_64/primary_db                         | 2.8 MB   00:01
(4/4): base/7/x86_64/primary_db                            | 6.0 MB   00:02
二、安装相关依赖。(这里已经安装过了)
[root@localhost docker_test]# yum install -y yum-utils device-mapper-persistent-data lvm2
Loaded plugins: fastestmirror, langpacks
Loading mirror speeds from cached hostfile
* base: mirrors.huaweicloud.com
* extras: mirrors.tuna.tsinghua.edu.cn
* updates: mirrors.huaweicloud.com
Package yum-utils-1.1.31-52.el7.noarch already installed and latest version
Package device-mapper-persistent-data-0.8.5-1.el7.x86_64 already installed and latest version
Package 7:lvm2-2.02.185-2.el7_7.2.x86_64 already installed and latest version
Nothing to do
三、添加docker的yum源。 这里安装的是docker社区免费版。
[root@localhost docker_test]# yum install docker-ce
Loaded plugins: fastestmirror, langpacks
Loading mirror speeds from cached hostfile
* base: mirrors.huaweicloud.com
* extras: mirrors.tuna.tsinghua.edu.cn
* updates: mirrors.huaweicloud.com
No package docker-ce available.
Error: Nothing to do
[root@localhost docker_test]#
在CentOS7.0上默认的源中没有docker的资源。(我这里安装的epel-release的源里也没有docker资源)
[root@localhost yum.repos.d]# pwd
/etc/yum.repos.d
[root@localhost yum.repos.d]# ls
CentOS-Base.repo       CentOS-fasttrack.repo  CentOS-Vault.repo
CentOS-CR.repo         CentOS-Media.repo      epel.repo
CentOS-Debuginfo.repo  CentOS-Sources.repo    epel-testing.repo
添加docker源。(可以看到添加docker源后,增加了一个yum源文件docker-ce.repo)
[root@localhost yum.repos.d]# yum-config-manager --add-repo https://download.docker.com/linux/centos/docker-ce.repo
Loaded plugins: fastestmirror, langpacks
adding repo from: https://download.docker.com/linux/centos/docker-ce.repo
grabbing file https://download.docker.com/linux/centos/docker-ce.repo to /etc/yum.repos.d/docker-ce.repo
repo saved to /etc/yum.repos.d/docker-ce.repo
[root@localhost yum.repos.d]# ls
CentOS-Base.repo       CentOS-fasttrack.repo  CentOS-Vault.repo  epel-testing.repo
CentOS-CR.repo         CentOS-Media.repo      docker-ce.repo
CentOS-Debuginfo.repo  CentOS-Sources.repo    epel.repo
[root@localhost yum.repos.d]#
查看仓库中所有docker版本。
[root@localhost yum.repos.d]# yum list docker-ce --showduplicates | sort -r
* updates: mirrors.huaweicloud.com
Loading mirror speeds from cached hostfile
Loaded plugins: fastestmirror, langpacks
* extras: mirrors.tuna.tsinghua.edu.cn
* epel: mirrors.tuna.tsinghua.edu.cn
docker-ce.x86_64            3:19.03.4-3.el7                     docker-ce-stable
docker-ce.x86_64            3:19.03.3-3.el7                     docker-ce-stable
docker-ce.x86_64            3:19.03.2-3.el7                     docker-ce-stable
docker-ce.x86_64            3:19.03.1-3.el7                     docker-ce-stable
.
.
.
安装docker社区免费版。
[root@localhost yum.repos.d]# yum install docker-ce
Loaded plugins: fastestmirror, langpacks
Loading mirror speeds from cached hostfile
* base: mirrors.huaweicloud.com
* epel: mirrors.tuna.tsinghua.edu.cn
* extras: mirrors.tuna.tsinghua.edu.cn
* updates: mirrors.huaweicloud.com
Resolving Dependencies
--> Running transaction check
---> Package docker-ce.x86_64 3:19.03.4-3.el7 will be installed
--> Processing Dependency: container-selinux >= 2:2.74 for package: 3:docker-ce-19.03.4-3.el7.x86_64
--> Processing Dependency: containerd.io >= 1.2.2-3 for package: 3:docker-ce-19.03.4-3.el7.x86_64
--> Processing Dependency: docker-ce-cli for package: 3:docker-ce-19.03.4-3.el7.x86_64
--> Running transaction check
---> Package container-selinux.noarch 2:2.107-3.el7 will be installed
---> Package containerd.io.x86_64 0:1.2.10-3.2.el7 will be installed
---> Package docker-ce-cli.x86_64 1:19.03.4-3.el7 will be installed
--> Finished Dependency Resolution


Dependencies Resolved


=======================================================================================
Package                Arch        Version                Repository             Size
=======================================================================================
Installing:
docker-ce              x86_64      3:19.03.4-3.el7        docker-ce-stable       24 M
Installing for dependencies:
container-selinux      noarch      2:2.107-3.el7          extras                 39 k
containerd.io          x86_64      1.2.10-3.2.el7         docker-ce-stable       23 M
docker-ce-cli          x86_64      1:19.03.4-3.el7        docker-ce-stable       39 M


Transaction Summary
=======================================================================================
Install  1 Package (+3 Dependent packages)


Total download size: 87 M
Installed size: 362 M
查看docker版本,启动docker
[root@localhost yum.repos.d]# docker version
Client: Docker Engine - Community
Version:           19.03.4
API version:       1.40
Go version:        go1.12.10
Git commit:        9013bf583a
Built:             Fri Oct 18 15:52:22 2019
OS/Arch:           linux/amd64
Experimental:      false
Cannot connect to the Docker daemon at unix:///var/run/docker.sock. Is the docker daemon running?
启动docker
[root@localhost yum.repos.d]# systemctl start docker
[root@localhost yum.repos.d]# systemctl status docker
● docker.service - Docker Application Container Engine
   Loaded: loaded (/usr/lib/systemd/system/docker.service; disabled; vendor preset: disabled)
   Active: active (running) since Fri 2019-11-08 03:31:55 EST; 32s ago
     Docs: https://docs.docker.com
Main PID: 1188 (dockerd)
    Tasks: 8
   Memory: 99.4M
   CGroup: /system.slice/docker.service
           └─1188 /usr/bin/dockerd -H fd:// --containerd=/run/containerd/containerd.sock


Nov 08 03:31:54 bogon dockerd[1188]: time="2019-11-08T03:31:54.384116486-05:00" level=info msg="ccResolverWrapper: s...e=grpc
Nov 08 03:31:54 bogon dockerd[1188]: time="2019-11-08T03:31:54.384130527-05:00" level=info msg="ClientConn switching...e=grpc
Nov 08 03:31:54 bogon dockerd[1188]: time="2019-11-08T03:31:54.416778226-05:00" level=info msg="[graphdriver] using ...rlay2"
Nov 08 03:31:54 bogon dockerd[1188]: time="2019-11-08T03:31:54.420853788-05:00" level=info msg="Loading containers: start."
Nov 08 03:31:55 bogon dockerd[1188]: time="2019-11-08T03:31:55.048703993-05:00" level=info msg="Default bridge (dock...dress"
Nov 08 03:31:55 bogon dockerd[1188]: time="2019-11-08T03:31:55.312303083-05:00" level=info msg="Loading containers: done."
Nov 08 03:31:55 bogon dockerd[1188]: time="2019-11-08T03:31:55.357432633-05:00" level=info msg="Docker daemon" commi...9.03.4
Nov 08 03:31:55 bogon dockerd[1188]: time="2019-11-08T03:31:55.357497299-05:00" level=info msg="Daemon has completed...ation"
Nov 08 03:31:55 bogon dockerd[1188]: time="2019-11-08T03:31:55.394993466-05:00" level=info msg="API listen on /var/r....sock"
Nov 08 03:31:55 bogon systemd[1]: Started Docker Application Container Engine.
Hint: Some lines were ellipsized, use -l to show in full.
[root@localhost yum.repos.d]#
0x03工具使用 将docker镜像pull下来。
[root@localhost yum.repos.d]# docker pull ullaakut/cameradar
Using default tag: latest
latest: Pulling from ullaakut/cameradar
9d48c3bd43c5: Pull complete
cc7766bf8751: Pull complete
a497a345880d: Pull complete
919b21ac9ea0: Pull complete
3f9aebbc778b: Pull complete
Digest: sha256:04bbc19c486584ccc12d8bca2bd07e24bb859b63c44e07c0c17e940ec8badc75
Status: Downloaded newer image for ullaakut/cameradar:latest
查看本地下载下来的镜像
[root@localhost yum.repos.d]# docker images
REPOSITORY           TAG                 IMAGE ID            CREATED             SIZE
ullaakut/cameradar   latest              fe268aaf499c        5 weeks ago         68.8MB
hello-world          latest              fce289e99eb9        10 months ago       1.84kB
[root@localhost yum.repos.d]#
具体使用方法
1、使用工具扫描单个摄像头设备: docker run ullaakut/cameradar --targets=“ip”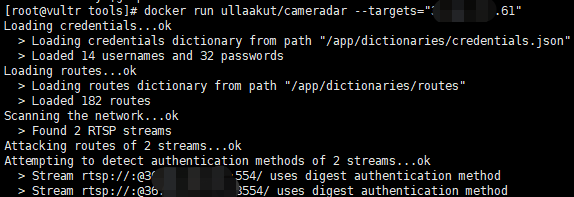 2、自定义扫描端口:
docker run ullaakut/cameradar --targets=“ip" --ports="554,5554,8554“
3、自定扫描的扫描使用的账密的字典和路由字典。
2、自定义扫描端口:
docker run ullaakut/cameradar --targets=“ip" --ports="554,5554,8554“
3、自定扫描的扫描使用的账密的字典和路由字典。
用法:
docker run -t -v /my/folder/with/dictionaries:/tmp/dictionaries \
           ullaakut/cameradar \
           -r "/tmp/dictionaries/my_routes" \
           -c "/tmp/dictionaries/my_credentials.json" \
           -t 172.19.124.0/24
正常情况下,工具会加载docker容器中默认的账密字典和路由字典
[root@localhost ~]# docker run  ullaakut/cameradar -t192.168.64.128
Loading credentials...ok
  > Loading credentials dictionary from path "/app/dictionaries/credentials.json"
  > Loaded 14 usernames and 32 passwords
Loading routes...ok
  > Loading routes dictionary from path "/app/dictionaries/routes"
  > Loaded 182 routes
Scanning the network...ok
  > Found 0 RTSP streams
? unable to attack empty list of targets
我们可以查看该工具的源文件,可以看到它的密码只有 账密字典中有14个用户名和32个密码,路径字典中有182个路径。
[root@localhost cameradar]# ls
attack.go       cmd           Dockerfile  helpers.go         LICENSE          README.md        scan_test.go
attack_test.go  curl.go       examples    helpers_test.go    loaders.go       scan.go          summary.go
cameradar.go    curl_test.go  go.mod      images             loaders_test.go  scanner.go       summary_test.go
CHANGELOG.md    dictionaries  go.sum      ISSUE_TEMPLATE.md  models.go        scanner_test.go  tools
[root@localhost cameradar]# cd dictionaries/
[root@localhost dictionaries]# ls
credentials.json  routes
[root@localhost dictionaries]# head credentials.json
{
  "usernames": [
    "",
    "666666",
    "888888",
    "Admin",
    "admin",
    "admin1",
    "administrator",
    "Administrator",
[root@localhost dictionaries]# head routes


/live/ch01_0
0/1:1/main
0/usrnm:pwd/main
0/video1
1
1.AMP
1/h264major
1/stream1
11
我们在本机新建自己的账密文件(使用数组的形式存储账密字典)
[root@localhost tools]# ls
my_credentials.json  my_routes
[root@localhost tools]# vim my_credentials.json
{
  "usernames": [
    "",
    "666666",
    "888888",
    "Admin",
    "admin",
    "admin1",
    "administrator",
    "Administrator",
    "aiphone",
    "Dinion",
    "root",
    "service",
    "supervisor",
    "ubnt",
    "test",
    "ciby",
    "hello"
  ],
  "passwords": [
    "",
    "111111",
    "1111111",
    "1234",
    "12345",
    "123456",
    "12345678",
    "4321",
    "666666",
    "888888",
    "9999",
    "admin",
    "administrator",
    "aiphone",
    "camera",
    "fliradmin",
    "hikvision",
    "hikadmin",
    "ikwd",
    "jvc",
    "meinsm",
    "pass",
    "password",
    "reolink",
    "root",
    "service",
    "supervisor",
    "system",
    "toor",
    "tp-link",
    "ubnt",
    "wbox123",
    "test.com",
    "test1.com",
    "123.com"
  ]
}
[root@localhost tools]# head my_routes

/live/ch01_0
0/1:1/main
0/usrnm:pwd/main
0/video1
1
1.AMP
1/h264major
1/stream1
11
将我们本机的字典挂在到容器中,然后使用-c -r 参数来调用自定义的字典。
[root@localhost tools]# docker run -t -v /home/docker_test/tools:/tmp ullaakut/cameradar -c "/tmp/my_credentials.json" -r "/tmp/my_routes" -t 192.168.64.128
Loading credentials...ok
  > Loading credentials dictionary from path "/tmp/my_credentials.json"
  > Loaded 17 usernames and 35 passwords
Loading routes...ok
  > Loading routes dictionary from path "/tmp/my_routes"
  > Loaded 182 routes
Scanning the network...ok
  > Found 0 RTSP streams
? unable to attack empty list of targets
4、批量扫描文件中的目标IP(这里IP可以有多种格式)
[root@localhost tools]# docker run -t -v /home/docker_test/tools:/tmp ullaakut/cameradar -c "/tmp/my_credentials.json" -r "/tmp/my_routes" -t "/home/docker_test/tools/target.txt"
Loading credentials...ok
  > Loading credentials dictionary from path "/tmp/my_credentials.json"
  > Loaded 17 usernames and 35 passwords
Loading routes...ok
  > Loading routes dictionary from path "/tmp/my_routes"
  > Loaded 182 routes
Scanning the network...ko
? error while scanning network: Unable to split netmask from target expression: "/home/docker_test/tools/target.txt"
WARNING: No targets were specified, so 0 hosts scanned
(这里报错了。未能拆分网络掩码,不懂go语言暂未解决)
可以扫C段:[root@localhost tools]# docker run -t -v /home/docker_test/tools:/tmp ullaakut/cameradar -c "/tmp/my_credentials.json" -r "/tmp/my_routes" -t 192.168.64.0/24 Loading credentials...ok > Loading credentials dictionary from path "/tmp/my_credentials.json" > Loaded 17 usernames and 35 passwords Loading routes...ok > Loading routes dictionary from path "/tmp/my_routes" > Loaded 182 routes Scanning the network...
5、其他参数
* “ -h”:显示用法信息
* “ -T,--2000ms timeout ”:(默认:)设置自定义超时值,在此之后应放弃没有答案的攻击尝试。在尝试扫描不稳定和慢速的网络时,建议增加该值;在快速可靠的网络中,建议减少该值。
* “ -d,-- debug ”:启用调试日志
* “ -v,-- verbose ”:启用详细的curl日志(不推荐用于大多数用途)
“ -s,--scan-speed”:(默认:)4设置自定义nmap发现预设以提高速度或准确性。如果您尝试扫描不稳定和慢速的网络,建议降低它,如果在性能良好且可靠的网络上,则建议增加它。您可能还希望将其保持在较低水平,以使发现变得隐秘。
参考链接: https://github.com/Ullaakut/cameradar https://blog.csdn.net/enter89/article/details/90295701 https://mp.weixin.qq.com/s/qB8IFgLPbgY0qQz5UO0Gsg https://www.cnblogs.com/qgc1995/archive/2018/08/29/9553572.html https://www.freebuf.com/sectool/150254.html https://www.cnblogs.com/ECJTUACM-873284962/p/9789130.html
原文链接:https://www.cnblogs.com/ciby/p/11852985.html
如有疑问请与原作者联系
标签:
版权申明:本站文章部分自网络,如有侵权,请联系:west999com@outlook.com
特别注意:本站所有转载文章言论不代表本站观点,本站所提供的摄影照片,插画,设计作品,如需使用,请与原作者联系,版权归原作者所有

上一篇:Linux安装JDK
- 针对Linux上Java程式运行脚本的Log信息记录操作人员记录以及 2020-04-27
- 流媒体服务器、海康威视 大华摄像头实现视频监控、直播解决 2020-04-07
- 文件查找 2019-12-17
- 分级防御针对Linux服务器的攻击 2009-05-13
- Linux操作系统上摄像头的使用小技巧 2008-02-23
IDC资讯: 主机资讯 注册资讯 托管资讯 vps资讯 网站建设
网站运营: 建站经验 策划盈利 搜索优化 网站推广 免费资源
网络编程: Asp.Net编程 Asp编程 Php编程 Xml编程 Access Mssql Mysql 其它
服务器技术: Web服务器 Ftp服务器 Mail服务器 Dns服务器 安全防护
软件技巧: 其它软件 Word Excel Powerpoint Ghost Vista QQ空间 QQ FlashGet 迅雷
网页制作: FrontPages Dreamweaver Javascript css photoshop fireworks Flash
