
SpringBoot 2.x (1):手动创建项目与自动创建…
2019-05-04 09:38:59来源:博客园 阅读 ()

SpringBoot 2.x基于Spring Framework 5.x
环境需求如下:
JDK1.8或以上
Maven3.2或以上
这里我使用的是Eclipse,IDEA这个工具很强大,但不习惯它
手工创建SpringBoot项目:
前提:电脑安装好Maven和JDK并且在Eclipse中配置完成
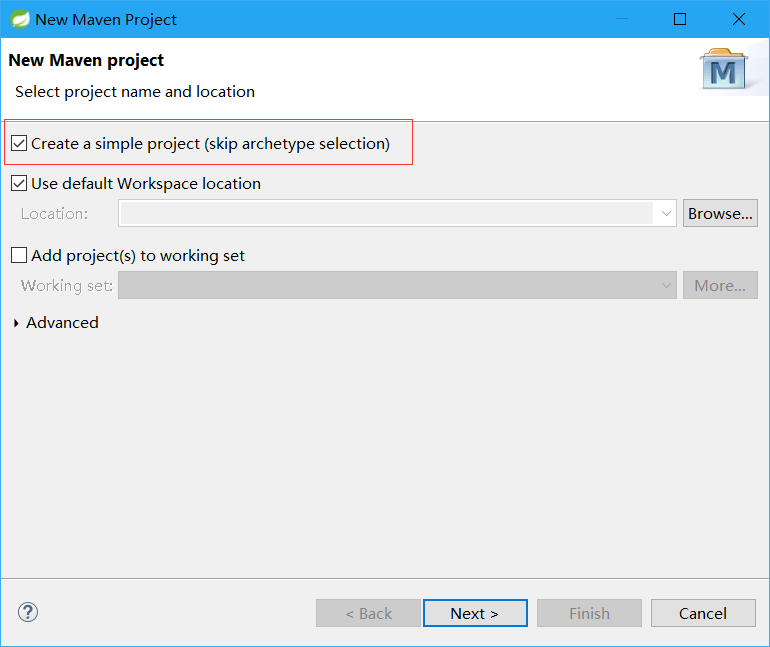
打开Eclipse->New->Maven Project:
注意勾选这个
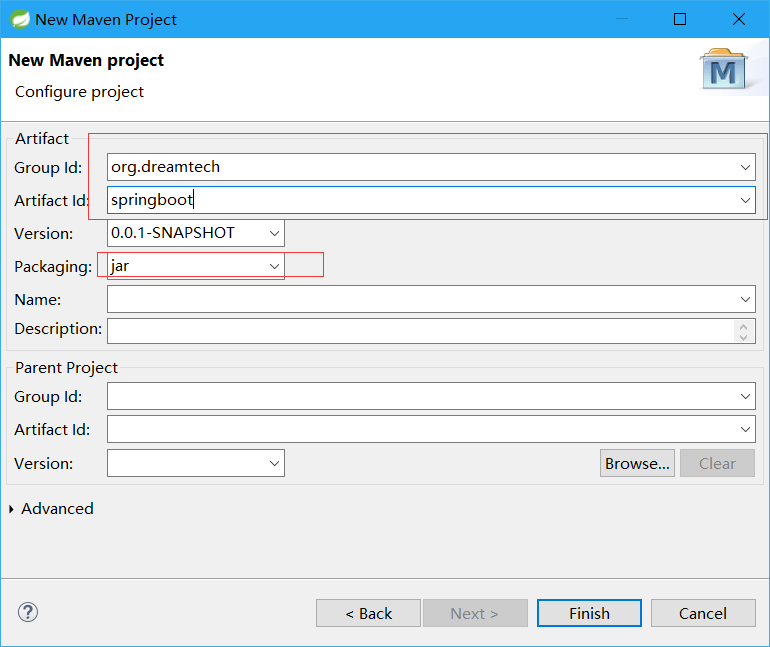
下一步:ID自己定义就好,注意这里先勾选为jar包
pom.xml进行修改:
<project xmlns="http://maven.apache.org/POM/4.0.0"
    xmlns:xsi="http://www.w3.org/2001/XMLSchema-instance"
    xsi:schemaLocation="http://maven.apache.org/POM/4.0.0 http://maven.apache.org/xsd/maven-4.0.0.xsd">
    <modelVersion>4.0.0</modelVersion>
    <groupId>org.dreamtech</groupId>
    <artifactId>springboot</artifactId>
    <version>0.0.1-SNAPSHOT</version>
    <parent>
        <groupId>org.springframework.boot</groupId>
        <artifactId>spring-boot-starter-parent</artifactId>
        <version>2.0.1.RELEASE</version>
    </parent>
    <dependencies>
        <dependency>
            <groupId>org.springframework.boot</groupId>
            <artifactId>spring-boot-starter-web</artifactId>
        </dependency>
    </dependencies>
</project>
保存后,如果项目有报错,不要慌:项目右键Maven->Update Project即可
新建一个包,新建一个类,以下代码:
package org.dreamtech.springboot.controller;

import org.springframework.boot.SpringApplication;
import org.springframework.boot.autoconfigure.EnableAutoConfiguration;
import org.springframework.stereotype.Controller;
import org.springframework.web.bind.annotation.RequestMapping;
import org.springframework.web.bind.annotation.ResponseBody;

@Controller
@EnableAutoConfiguration
public class SampleController {

    @RequestMapping("/")
    @ResponseBody
    String home() {
        return "Hello World!";
    }

    public static void main(String[] args) throws Exception {
        SpringApplication.run(SampleController.class, args);
    }
}
右键Run As Java Application
访问:http://localhost:8080/
Hello World完成!
自动创建项目:
访问:https://start.spring.io/
注意选择Web依赖

生成下载解压,然后在Eclipse中导入即可:(Import Exist Maven Project)

导入后直接启动即可,不过访问localhost:8080会显示错误,因为没有定义Controller
自己定义即可
看一下自动生成的pom.xml:
<?xml version="1.0" encoding="UTF-8"?>
<project xmlns="http://maven.apache.org/POM/4.0.0"
    xmlns:xsi="http://www.w3.org/2001/XMLSchema-instance"
    xsi:schemaLocation="http://maven.apache.org/POM/4.0.0 http://maven.apache.org/xsd/maven-4.0.0.xsd">
    <modelVersion>4.0.0</modelVersion>
    <!-- 这里可以按Ctrl点进去查看父依赖信息 -->
    <parent>
        <groupId>org.springframework.boot</groupId>
        <artifactId>spring-boot-starter-parent</artifactId>
        <version>2.1.4.RELEASE</version>
        <relativePath />
    </parent>
    <groupId>org.dreamtech</groupId>
    <artifactId>springboot</artifactId>
    <version>0.0.1-SNAPSHOT</version>
    <name>springboot</name>
    <description>Demo project for Spring Boot</description>
    <!-- 这里可以对项目进行配置 -->
    <properties>
        <!-- 定义JDK1.8 -->
        <java.version>1.8</java.version>
    </properties>

    <!-- SpringBoot依赖 -->
    <dependencies>
        <dependency>
            <groupId>org.springframework.boot</groupId>
            <artifactId>spring-boot-starter-web</artifactId>
        </dependency>

        <dependency>
            <groupId>org.springframework.boot</groupId>
            <artifactId>spring-boot-starter-test</artifactId>
            <scope>test</scope>
        </dependency>
    </dependencies>

    <!-- Maven构建插件 -->
    <build>
        <plugins>
            <plugin>
                <groupId>org.springframework.boot</groupId>
                <artifactId>spring-boot-maven-plugin</artifactId>
            </plugin>
        </plugins>
    </build>

</project>
查看自动生成的主类:和手动方式的区别只是少了Controller
package org.dreamtech.springboot;

import org.springframework.boot.SpringApplication;
import org.springframework.boot.autoconfigure.SpringBootApplication;

@SpringBootApplication
public class SpringbootApplication {

    public static void main(String[] args) {
        SpringApplication.run(SpringbootApplication.class, args);
    }

}
自动生成的还有application.properties等文件,这些具体的以后再讲
推荐:使用自动工具替代手动方式
这一节比较简单,就是SpringBoot的Hello World,所以篇幅较少,大家见谅
原文链接:https://www.cnblogs.com/xuyiqing/p/10802890.html
如有疑问请与原作者联系
标签:
版权申明:本站文章部分自网络,如有侵权,请联系:west999com@outlook.com
特别注意:本站所有转载文章言论不代表本站观点,本站所提供的摄影照片,插画,设计作品,如需使用,请与原作者联系,版权归原作者所有

- springboot2配置JavaMelody与springMVC配置JavaMelody 2020-06-11
- SpringBoot 2.3 整合最新版 ShardingJdbc + Druid + MyBatis 2020-06-11
- 掌握SpringBoot-2.3的容器探针:实战篇 2020-06-11
- nacos~配置中心功能~springboot的支持 2020-06-10
- SpringBoot + Vue + ElementUI 实现后台管理系统模板 -- 后 2020-06-10
IDC资讯: 主机资讯 注册资讯 托管资讯 vps资讯 网站建设
网站运营: 建站经验 策划盈利 搜索优化 网站推广 免费资源
网络编程: Asp.Net编程 Asp编程 Php编程 Xml编程 Access Mssql Mysql 其它
服务器技术: Web服务器 Ftp服务器 Mail服务器 Dns服务器 安全防护
软件技巧: 其它软件 Word Excel Powerpoint Ghost Vista QQ空间 QQ FlashGet 迅雷
网页制作: FrontPages Dreamweaver Javascript css photoshop fireworks Flash
