
SpringCloud(八):springcloud-bus消息总线(…
2019-11-13 16:07:43来源:博客园 阅读 ()
 SpringCloud(八):springcloud-bus消息总线(刷新配置服务)
Bus消息总线:
好了现在我们接着上一篇的随笔,继续来讲。上一篇我们讲到,我们如果要去更新所有微服务的配置,在不重启的情况下去更新配置,只能依靠spring cloud config了,但是,是我们要一个服务一个服务的发送post请求,
我们能受的了吗?这比之前的没配置中心好多了,那么我们如何继续避免挨个挨个的向服务发送Post请求来告知服务,你的配置信息改变了,需要及时修改内存中的配置信息。
这时候我们就不要忘记消息队列的发布订阅模型。让所有为服务来订阅这个事件,当这个事件发生改变了,就可以通知所有微服务去更新它们的内存中的配置信息。
这时Bus消息总线就能解决,你只需要在springcloud Config Server端发出refresh,就可以触发所有微服务更新了。
Spring Cloud Bus除了支持RabbitMQ的自动化配置之外,还支持现在被广泛应用的Kafka。在本文中,我们将搭建一个Kafka的本地环境,并通过它来尝试使用Spring Cloud Bus对Kafka的支持,实现消息总线的功能。
window下安装kafka和zooker,超详细:https://blog.csdn.net/weixin_33446857/article/details/81982455
kafka:安装下载教程网址(CentOS Linux):https://www.cnblogs.com/subendong/p/7786547.html
zooker的下载安装网址:https://blog.csdn.net/ring300/article/details/80446918
项目: 一个服务端。2个客户端。
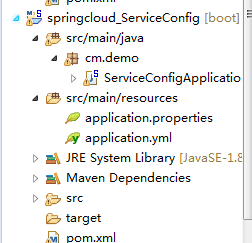
pom文件:
<project xmlns="http://maven.apache.org/POM/4.0.0" xmlns:xsi="http://www.w3.org/2001/XMLSchema-instance" xsi:schemaLocation="http://maven.apache.org/POM/4.0.0 http://maven.apache.org/xsd/maven-4.0.0.xsd">
  <modelVersion>4.0.0</modelVersion>
  <groupId>com.demo</groupId>
  <artifactId>springcloud_serviceClient2</artifactId>
  <version>0.0.1-SNAPSHOT</version>
<parent>
        <groupId>org.springframework.boot</groupId>
        <artifactId>spring-boot-starter-parent</artifactId>
        <version>2.0.3.RELEASE</version>
        <relativePath/>
    </parent>

     <properties>
        <project.build.sourceEncoding>UTF-8</project.build.sourceEncoding>
        <project.reporting.outputEncoding>UTF-8</project.reporting.outputEncoding>
        <java.version>1.8</java.version>
        <spring-cloud.version>Finchley.RELEASE</spring-cloud.version>
    </properties>

    <dependencyManagement>
        <dependencies>
            <dependency>
                <groupId>org.springframework.cloud</groupId>
                <artifactId>spring-cloud-dependencies</artifactId>
                <version>${spring-cloud.version}</version>
                <type>pom</type>
                <scope>import</scope>
            </dependency>
        </dependencies>
    </dependencyManagement>

 <dependencies>
         <dependency>
            <groupId>org.springframework.cloud</groupId>
            <artifactId>spring-cloud-starter-eureka-server</artifactId>
            <version>1.3.4.RELEASE</version>
          </dependency>
        <dependency>
            <groupId>org.springframework.cloud</groupId>
            <artifactId>spring-cloud-starter-bus-kafka</artifactId>
            <version>1.3.2.RELEASE</version>
        </dependency>
         <dependency>
            <groupId>org.springframework.cloud</groupId>
            <artifactId>spring-cloud-starter-config</artifactId>
            <version>1.4.0.RELEASE</version>
        </dependency>
         <dependency>
            <groupId>org.springframework.cloud</groupId>
            <artifactId>spring-cloud-config-client</artifactId>
             <version>1.4.0.RELEASE</version>
        </dependency>
         <!--Spring Boot Actuator,感应服务端变化-->
         <dependency>
            <groupId>org.springframework.boot</groupId>
            <artifactId>spring-boot-starter-actuator</artifactId>
        </dependency>
        <dependency>
            <groupId>org.springframework.boot</groupId>
            <artifactId>spring-boot-starter-web</artifactId>
        </dependency>
        <dependency>
            <groupId>org.springframework.boot</groupId>
            <artifactId>spring-boot-starter-test</artifactId>
            <scope>test</scope>
        </dependency>
    </dependencies>
</project>
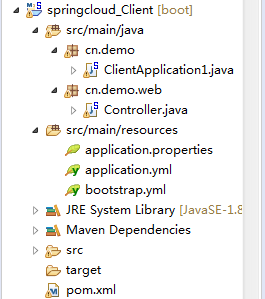
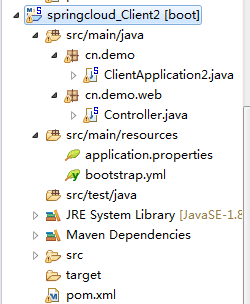
client1的配置文件要改为bootstrap.yml,因为这种配置格式,是优先加载的,上一篇随笔有讲过,client2的配置如下:
server:
 port: 7008
spring:
 application:
  name: config2
 cloud:
  config:
   label: master
#启动什么环境下的配置,dev 表示开发环境,这跟你仓库的文件的后缀有关,比如,仓库配置文件命名格式是cloud-config-dev.properties,所以profile 就要写dev
   profile: dev
   name: cloud-config
   discovery:
    enabled: true
#这个名字是Config Server端的服务名字,不能瞎写。
    service-id: CONFIG-SERVER
    management:
#是否需要权限拉去,默认是true,如果不false就不允许你去拉取配置中心Server更新的内容
  security:
    enabled: false
#注册中心
eureka:
 client:
  service-url:
   defaultZone: http://localhost:8001/eureka/
启动类:
package cn.demo;

import org.springframework.boot.SpringApplication;
import org.springframework.boot.autoconfigure.SpringBootApplication;
import org.springframework.cloud.client.discovery.EnableDiscoveryClient;

@SpringBootApplication
@EnableDiscoveryClient
public class ClientApplication2 {

     public static void main(String[] args) {
         SpringApplication.run(ClientApplication2.class, args);
         System.out.println("启动成功!");
controller类:
package cn.demo.web;

import org.springframework.beans.factory.annotation.Value;
import org.springframework.cloud.context.config.annotation.RefreshScope;
import org.springframework.web.bind.annotation.GetMapping;
import org.springframework.web.bind.annotation.RequestMapping;
import org.springframework.web.bind.annotation.RequestParam;
import org.springframework.web.bind.annotation.RestController;

@RestController
@RefreshScope
public class Controller {

         /*@Value("${spring.cloud}")
        private String config;

        @GetMapping("/test/config")
        public String test() {
            return config;
        }*/

    @Value("${name}")
    private String name;
    @Value("${age}")
    private Integer age;

    @RequestMapping("/test")
    public String test(){
        return this.name+this.age;
    }

}
接着将client2中的的代码基本和client的一样,只是暴露服务的端口不同。
然后:
把zooker,kafka启动;(标题下面链接)
把前面的工程,1个注册中心,一个springcloud-config-server,两个springcloud-config-client,springcloud-config-client1启动起来,
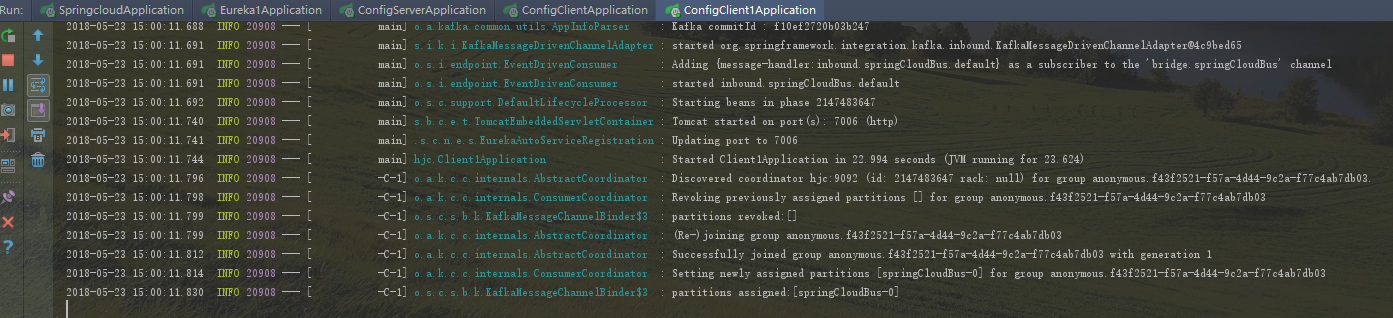
可以看到springcloudBus是在0分片上,如果两个config-client启动都出现上面信息,证明启动成功了。
访问:http://localhost:7000/cloud-config-dev.properties

再访问两个client,如下:
http://localhost:7006/test http://localhost:7008/test

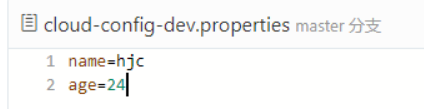
好了,好戏开始了,现在我们去git仓库上修改配置中心的文件,将年龄改为24,如下:
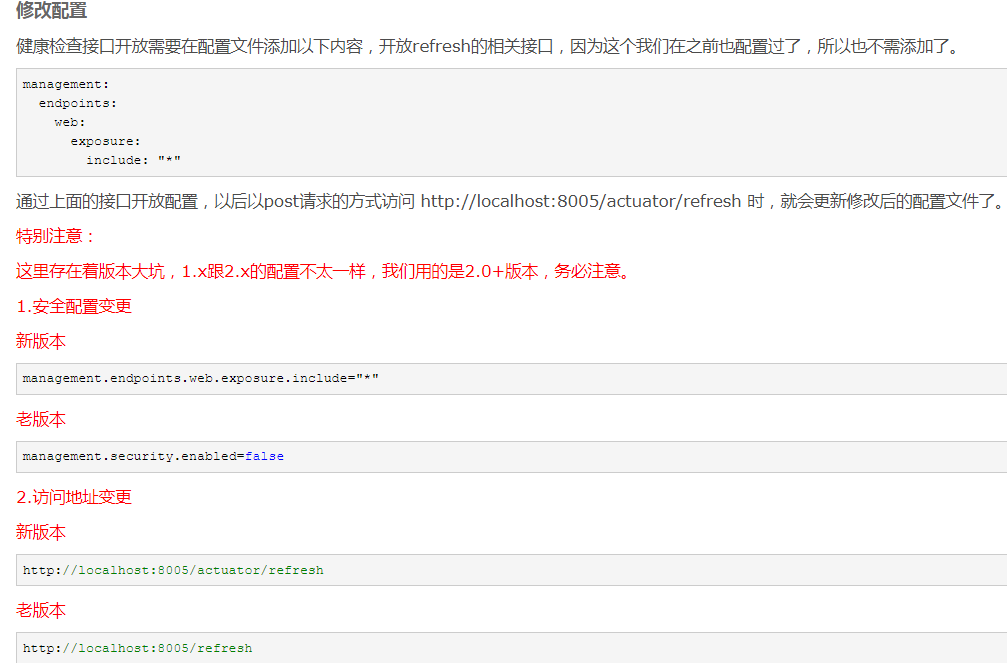
接下来,我们我们用refresh刷新配置服务端7000配置,通知两个client去更新内存中的配置信息。用postman发送localhost:7000/bus/refresh,如下:
注意:spring1.x和spring2.x 刷新的路径不一样。
----------------------------------------------------
看一下返回的结果:

可以看到没有返回什么信息,但是不要担心,这是成功的通知所有client去更新了内存中的信息了。
接着我们分别重新请求config-server,两个client,刷新页面,结果如下:
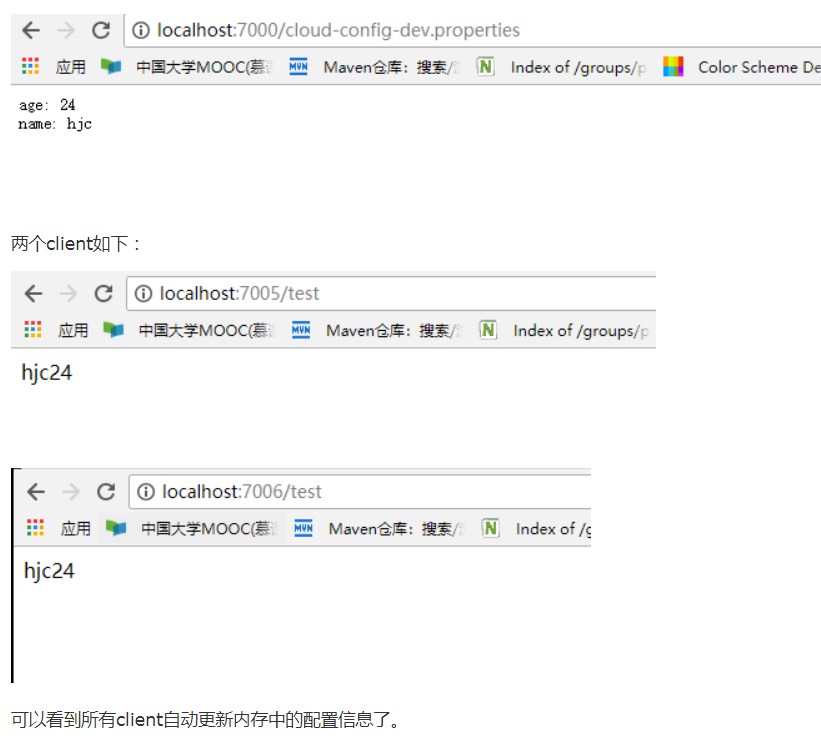
到目前为止,上面都是刷新说有的配置的信息的,如果我们想刷新某个特定服务的配置信息也是可以的。我们可以指定刷新范围,如下:
指定刷新范围
上面的例子中,我们通过向服务实例请求Spring Cloud Bus的/bus/refresh接口,从而触发总线上其他服务实例的/refresh。但是有些特殊场景下(比如:灰度发布),我们希望可以刷新微服务中某个具体实例的配置。
Spring Cloud Bus对这种场景也有很好的支持:/bus/refresh接口还提供了destination参数,用来定位具体要刷新的应用程序。比如,我们可以请求/bus/refresh?destination=服务名字:9000,此时总线上的各应用实例会根据destination属性的值来判断是否为自己的实例名,
若符合才进行配置刷新,若不符合就忽略该消息。
destination参数除了可以定位具体的实例之外,还可以用来定位具体的服务。定位服务的原理是通过使用Spring的PathMatecher(路径匹配)来实现,比如:/bus/refresh?destination=customers:**,该请求会触发customers服务的所有实例进行刷新。
原文链接:https://www.cnblogs.com/2019lgg/p/11850794.html
如有疑问请与原作者联系
标签:
版权申明:本站文章部分自网络,如有侵权,请联系:west999com@outlook.com
特别注意:本站所有转载文章言论不代表本站观点,本站所提供的摄影照片,插画,设计作品,如需使用,请与原作者联系,版权归原作者所有

- 数据源管理 | Kafka集群环境搭建,消息存储机制详解 2020-06-11
- 为什么要用springcloud? 2020-06-02
- 高吞吐量的分布式发布订阅消息系统Kafka之Producer源码分析 2020-05-30
- SpringBoot2.3整合RabbitMQ实现延迟消费消息 2020-05-26
- SpringCloud Alibaba 简介 2020-05-26
IDC资讯: 主机资讯 注册资讯 托管资讯 vps资讯 网站建设
网站运营: 建站经验 策划盈利 搜索优化 网站推广 免费资源
网络编程: Asp.Net编程 Asp编程 Php编程 Xml编程 Access Mssql Mysql 其它
服务器技术: Web服务器 Ftp服务器 Mail服务器 Dns服务器 安全防护
软件技巧: 其它软件 Word Excel Powerpoint Ghost Vista QQ空间 QQ FlashGet 迅雷
网页制作: FrontPages Dreamweaver Javascript css photoshop fireworks Flash
