
spring boot2 修改默认json解析器Jackson为fastj…
2019-12-08 16:03:11来源:博客园 阅读 ()

spring boot2 修改默认json解析器Jackson为fastjson
0、前言
fastjson是阿里出的,尽管近年fasjson爆出过几次严重漏洞,但是平心而论,fastjson的性能的确很有优势,尤其是大数据量时的性能优势,所以fastjson依然是我们的首选;spring boot默认的json解析器是Jackson,替换为fastjson很有必要;
1、替换方法
1.1、引入依赖,【注意,1.2.61以下有严重高危漏洞,1.2.61修复,必须升级到1.2.61,目前最新版本为1.2.62】
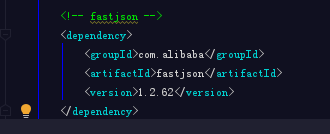
        <!-- fastjson -->
        <dependency>
            <groupId>com.alibaba</groupId>
            <artifactId>fastjson</artifactId>
            <version>1.2.62</version>
        </dependency>
1.2、配置
注意:Springboot2.0以后,WebMvcConfigurerAdapter 过时了, 以前1版本继承WebMvcConfigurerAdapter 来实现的方法不推荐了。下面介绍两种配置方式,还有一种实现WebMvcConfigurationSupport的方式就不介绍了,道路千万条,选一条就足够了:
方式一(推荐):用bean替代默认解析器
package com.anson.config;

import com.alibaba.fastjson.serializer.SerializerFeature;
import com.alibaba.fastjson.support.config.FastJsonConfig;
import com.alibaba.fastjson.support.spring.FastJsonHttpMessageConverter;
import org.springframework.boot.autoconfigure.http.HttpMessageConverters;
import org.springframework.context.annotation.Bean;
import org.springframework.context.annotation.Configuration;
import org.springframework.http.MediaType;
import org.springframework.http.converter.HttpMessageConverter;

import java.nio.charset.Charset;
import java.util.ArrayList;
import java.util.List;

@Configuration
public class WebConfig {

    /**
     * @Author anson
     * @Description 配置消息转换器
     * @Date: 2019-12-8 11:23:33
     * @version: 1.0
     * new HttpMessageConverters(true, converters);
     * 一定要设为true才能替换否则不会替换
     * @return 返回一个消息转换的bean
     */
    @Bean
    public HttpMessageConverters fastJsonMessageConverters() {
        List<HttpMessageConverter<?>> converters = new ArrayList<>();
        //需要定义一个convert转换消息的对象;
        FastJsonHttpMessageConverter fastConverter = new FastJsonHttpMessageConverter();
        //添加fastJson的配置信息;
        FastJsonConfig fastJsonConfig = new FastJsonConfig();
        fastJsonConfig.setSerializerFeatures(SerializerFeature.PrettyFormat);
        //全局时间配置
        fastJsonConfig.setDateFormat("yyyy-MM-dd HH:mm:ss");
        fastJsonConfig.setCharset(Charset.forName("UTF-8"));
        //处理中文乱码问题
        List<MediaType> fastMediaTypes = new ArrayList<>();
        fastMediaTypes.add(MediaType.APPLICATION_JSON_UTF8);
        //在convert中添加配置信息.
        fastConverter.setSupportedMediaTypes(fastMediaTypes);
        fastConverter.setFastJsonConfig(fastJsonConfig);

        converters.add(0, fastConverter);
        return new HttpMessageConverters(converters);
    }
}
方式二、实现WebMvcConfigurer
@Configuration
public class WebConfigure implements WebMvcConfigurer

{

    /**
     * 配置消息转换器
     * @param converters
     */
    @Override
    public void configureMessageConverters(List<HttpMessageConverter<?>> converters) {
       //需要定义一个convert转换消息的对象;
        FastJsonHttpMessageConverter fastConverter = new FastJsonHttpMessageConverter();
        //添加fastJson的配置信息;
        FastJsonConfig fastJsonConfig = new FastJsonConfig();
        fastJsonConfig.setSerializerFeatures(SerializerFeature.PrettyFormat);
        //全局时间配置
        fastJsonConfig.setDateFormat("yyyy-MM-dd HH:mm:ss");
        fastJsonConfig.setCharset(Charset.forName("UTF-8"));
        //处理中文乱码问题
        List<MediaType> fastMediaTypes = new ArrayList<>();
        fastMediaTypes.add(MediaType.APPLICATION_JSON_UTF8);
        //在convert中添加配置信息.
        fastConverter.setSupportedMediaTypes(fastMediaTypes);
        fastConverter.setFastJsonConfig(fastJsonConfig);
        converters.add(0,fastConverter);
    }
}
原文链接:https://www.cnblogs.com/yanghj/p/12005130.html
如有疑问请与原作者联系
标签:
版权申明:本站文章部分自网络,如有侵权,请联系:west999com@outlook.com
特别注意:本站所有转载文章言论不代表本站观点,本站所提供的摄影照片,插画,设计作品,如需使用,请与原作者联系,版权归原作者所有

- Spring系列.ApplicationContext接口 2020-06-11
- springboot2配置JavaMelody与springMVC配置JavaMelody 2020-06-11
- 给你一份超详细 Spring Boot 知识清单 2020-06-11
- SpringBoot 2.3 整合最新版 ShardingJdbc + Druid + MyBatis 2020-06-11
- 掌握SpringBoot-2.3的容器探针:实战篇 2020-06-11
IDC资讯: 主机资讯 注册资讯 托管资讯 vps资讯 网站建设
网站运营: 建站经验 策划盈利 搜索优化 网站推广 免费资源
网络编程: Asp.Net编程 Asp编程 Php编程 Xml编程 Access Mssql Mysql 其它
服务器技术: Web服务器 Ftp服务器 Mail服务器 Dns服务器 安全防护
软件技巧: 其它软件 Word Excel Powerpoint Ghost Vista QQ空间 QQ FlashGet 迅雷
网页制作: FrontPages Dreamweaver Javascript css photoshop fireworks Flash
