
使用java基础实现一个简陋的web服务器软件
2020-02-22 16:04:45来源:博客园 阅读 ()

使用java基础实现一个简陋的web服务器软件
使用java基础实现一个简陋的web服务器软件
1、写在前面
大学已经过了一年半了,从接触各种web服务器软件已经有一年多了,从大一上最开始折腾Windows电脑自带的IIS开始,上手了自己的第一个静态网站,从此开启了web方向学习的兴趣。到现在,从陪伴了javaweb阶段的Tomcat走来,也陆续接触了jetty,Nginx等web服务器软件。但是,这些web服务器的软件也一直都是开箱即用,从未探究过其背后的原理。今天,尽量用最简单的java代码,实现一个最简陋的web服务器软件,揭开web服务器软件的神秘面纱。
2、Tomcat的架构模式
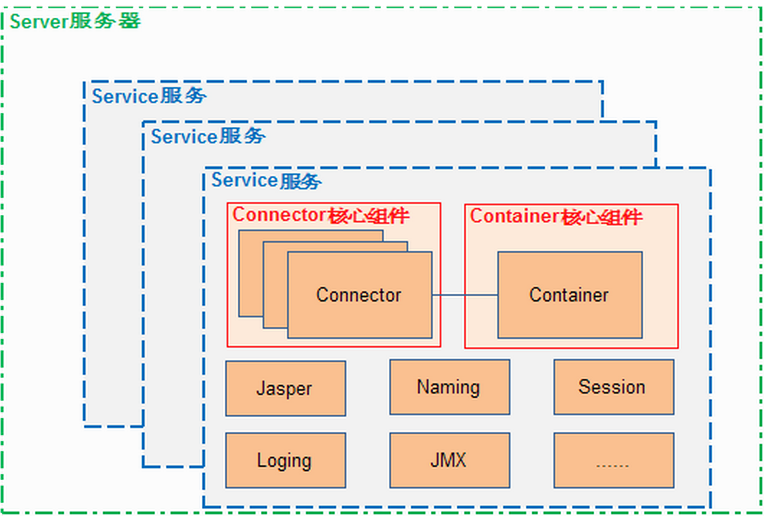
由上图可以看出,Tomcat作为如今相对成熟的web服务器软件,有着相对较为复杂的架构,有着Server、Service、Engine、Connerctor、Host、Context等诸多组件。对于Tomcat的源码分析将在以后的博文中分篇讲解
,在此不在叙述。本节主要是实现一个自己的web服务器软件,其架构也超级简单。
3、编写一个简单的web服务器类
3.1、web服务器软件面向的浏览器客户,因此在同一时间肯定不止有一个http请求,因此肯定需要开启多线程来进行服务,对类上实现Runnable接口,并重写其中的run方法。
public class ServerThread implements Runnable {
    @Override
    public void run() {}
}
3.2、在本类中只有两个方法,其中构造方法用来初始化该web服务器需要的资源,run方法用来处理请求,开启服务。
3.3、首先,我们先需要定义一堆类级别的变量,如:
浏览器发送Http请求时,需要有一个Socket来接受,并且需要或等输入、输出流。
    private Socket client;
    private InputStream in;
    private OutputStream out;
在Tomcat中,有一个webapp文件夹用来存放静态资源,在此,我们也在D盘根路径下定义一个webroot文件夹,用来存储静态的资源。(该路径也可以通过获取当前j软件的相对路径来动态生成,但是为了简单起见,更好的揭示web服务器的工作流程,在此采用的是绝对路径)
private static final String WEBROOT = "D:\\webroot\\";
3.4、通过构造函数来初始化全局变量
    /**
     * 构造函数初始化客户端
     */
    public ServerThread(Socket client) {
        this.client = client;
        //其他初始化信息
        try {
            //获取客户端连接的流对象
            in = client.getInputStream();
            out = client.getOutputStream();

        } catch (IOException e) {
            e.printStackTrace();
        }
    }
该构造函数相当的简单,就是获取浏览器发来的Socket,并拿到其中的输入、输出流,然后赋值给全局变量。
3.5、run()方法方法体的编写
- 通过输入流获得请求的内容
            //读取请求的内容
            reader = new BufferedReader(new InputStreamReader(in));
解析获取的内容,并且放回网站得首页(index.html)
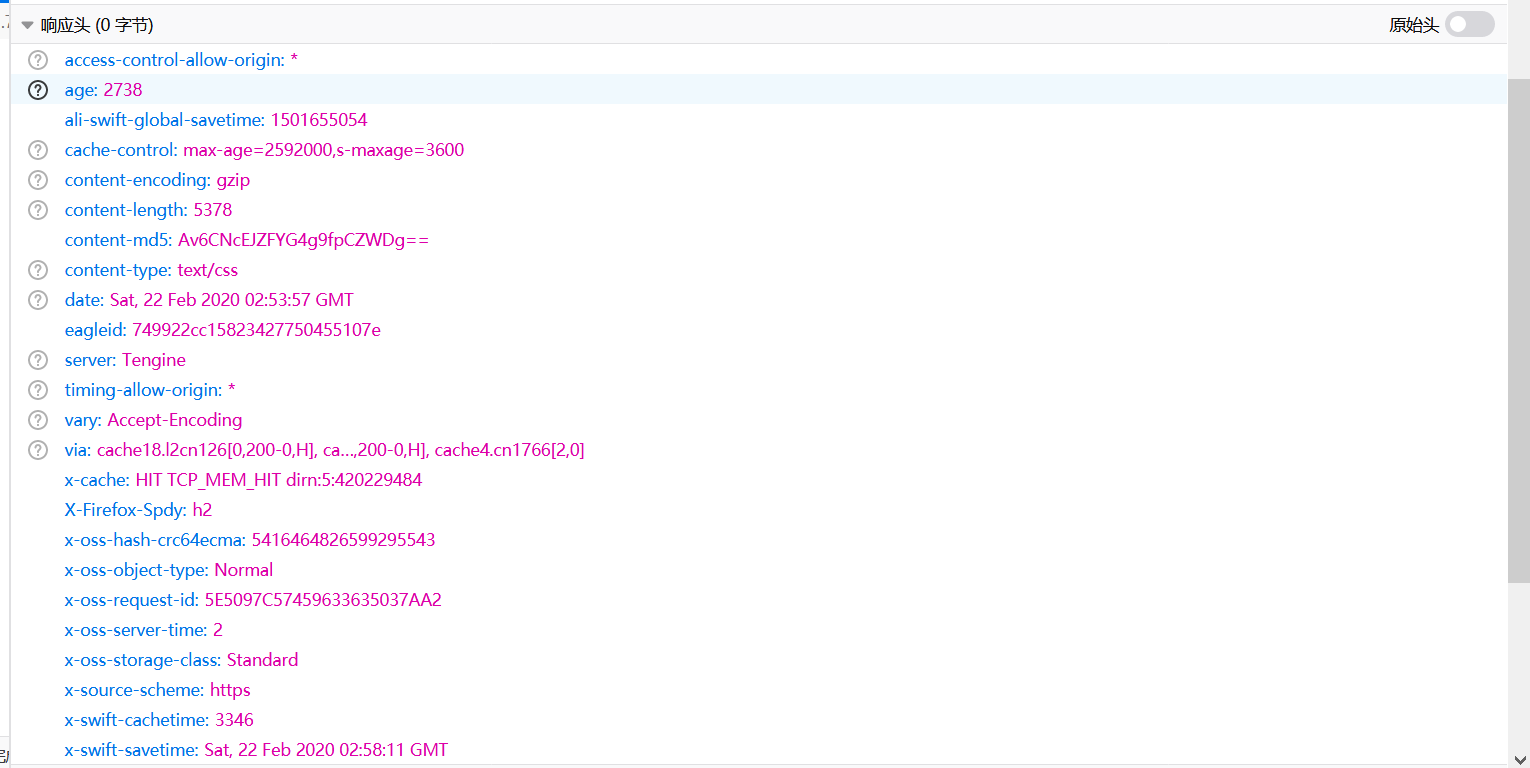
            //取得:后面得内容
            String line = reader.readLine().split(" ")[1].replace("/","\\");
            if("\\".equals(line)) {
                line += "index.html";
            }

            System.out.println(line);
            //获取文件的后缀名
            String strType = line.substring(line.lastIndexOf(".")+1, line.length());
            System.out.println("strType = " + strType);
给浏览器进行响应(用浏览器打开任意一个网站,调出控制台观查其响应头,因此我们的web服务器也应该把响应头给浏览器写出)
所以我们的代码应该为:
            //给用户响应
            pw = new PrintWriter(out);
            input = new FileInputStream(WEBROOT + line);

            //BufferedReader buffer = new BufferedReader(new InputStreamReader(input));
            //写响应头
            pw.println("HTTP/1.1 200 ok");
            pw.println("Content-Type: "+ contentMap.get(strType)  +";charset=utf-8");
            pw.println("Content-Length: " + input.available());
            pw.println("Server: hello");
            pw.println("Date: " + new Date());
            pw.println();
            pw.flush();
因为放返回数据的类型有多样,所以我们可以用一个map集合来存储,并在类加载前将数据存入。
    /**
     * 静态资源的集合(对应的文本类型)
     */
    private static Map<String,String> contentMap = new HashMap<>();

    //初始化静态资源的集合
    static {
        contentMap.put("html", "text/html");
        contentMap.put("htm", "text/html");
        contentMap.put("jpg", "image/jpeg");
        contentMap.put("jpeg", "image/jpeg");
        contentMap.put("gif", "image/gif");
        contentMap.put("js", "application/javascript");
        contentMap.put("css", "text/css");
        contentMap.put("json", "application/json");
        contentMap.put("mp3", "audio/mpeg");
        contentMap.put("mp4", "video/mp4");
    }
3.6、向浏览器写回数据,并写完后进行刷新
            //向浏览器写数据
            byte[] bytes = new byte[1024];
            int len = 0;
            while ((len = input.read(bytes)) != -1){
                out.write(bytes, 0, len);
            }
            pw.flush();
3.7、关闭流、释放资源
                if(input != null) {
                    input.close();
                }

                if(pw != null) {
                    pw.close();
                }

                if(reader != null) {
                    reader.close();
                }
                if(out != null) {
                    out.close();
                }

                if(client != null) {
                    client.close();

                }
3.8、该类完整的代码为:
package com.xgp.company;

import java.io.*;
import java.net.Socket;
import java.util.Date;
import java.util.HashMap;
import java.util.Map;
import java.util.concurrent.ConcurrentHashMap;

/**
 * 服务线程
 * @author 薛国鹏
 */
public class ServerThread implements Runnable {

    /**
     * 静态资源的集合(对应的文本类型)
     */
    private static Map<String,String> contentMap = new HashMap<>();

    //初始化静态资源的集合
    static {
        contentMap.put("html", "text/html");
        contentMap.put("htm", "text/html");
        contentMap.put("jpg", "image/jpeg");
        contentMap.put("jpeg", "image/jpeg");
        contentMap.put("gif", "image/gif");
        contentMap.put("js", "application/javascript");
        contentMap.put("css", "text/css");
        contentMap.put("json", "application/json");
        contentMap.put("mp3", "audio/mpeg");
        contentMap.put("mp4", "video/mp4");
    }

    private Socket client;
    private InputStream in;
    private OutputStream out;

    private static final String WEBROOT = "D:\\webroot\\";

    /**
     * 构造函数初始化客户端
     */
    public ServerThread(Socket client) {
        this.client = client;
        //其他初始化信息
        try {
            //获取客户端连接的流对象
            in = client.getInputStream();
            out = client.getOutputStream();

        } catch (IOException e) {
            e.printStackTrace();
        }
    }

    /**
     * 解析信息,给用户响应
     */
    @Override
    public void run() {
        PrintWriter pw = null;
        BufferedReader reader = null;
        FileInputStream input = null;
        try {
            //读取请求的内容
            reader = new BufferedReader(new InputStreamReader(in));

            /**
             * //请求的资源
             * //解析请求头
             * Host: static.zhihu.com
             * User-Agent: Mozilla/5.0 (Windows NT 10.0; Win64; x64; rv:73.0) Gecko/20100101 Firefox/73.0
             * Accept: text/css,
             */
            //取得:后面得内容
            String line = reader.readLine().split(" ")[1].replace("/","\\");
            if("\\".equals(line)) {
                line += "index.html";
            }

            System.out.println(line);
            //获取文件的后缀名
            String strType = line.substring(line.lastIndexOf(".")+1, line.length());
            System.out.println("strType = " + strType);


            //给用户响应
            pw = new PrintWriter(out);
            input = new FileInputStream(WEBROOT + line);

            //BufferedReader buffer = new BufferedReader(new InputStreamReader(input));
            //写响应头
            pw.println("HTTP/1.1 200 ok");
            pw.println("Content-Type: "+ contentMap.get(strType)  +";charset=utf-8");
            pw.println("Content-Length: " + input.available());
            pw.println("Server: hello");
            pw.println("Date: " + new Date());
            pw.println();
            pw.flush();

            //向浏览器写数据
            byte[] bytes = new byte[1024];
            int len = 0;
            while ((len = input.read(bytes)) != -1){
                out.write(bytes, 0, len);
            }
            pw.flush();

        }catch (Exception e) {
            throw new RuntimeException(e.getMessage() + "服务端的run方法出错");
        }finally {
            try {
                if(input != null) {
                    input.close();
                }

                if(pw != null) {
                    pw.close();
                }

                if(reader != null) {
                    reader.close();
                }
                if(out != null) {
                    out.close();
                }

                if(client != null) {
                    client.close();

                }
            } catch (IOException e) {
                e.printStackTrace();
            }

        }
    }
}
4、编写启动类
4.1、一般连接性行为会采用池化技术,这里使用一个可以弹性伸缩的线程池。(如果想要跟为专业化,最好是使用一个默认的线程数量的线程池,并且可以让开发者自行设定)
            //创建一个可伸缩的连接池
            pool = Executors.newCachedThreadPool();
4.2、监听端口。(这里监听的是80端口,其实监听端口的权力应该交给使用者指定)
            //启动服务器,监听8080端口
            server = new ServerSocket(80);
            System.out.println("服务器启动,当前端口为80");
4.3、启动服务器,处理来自于浏览器的请求
while (!Thread.interrupted()){
    //不停接收客户端请求
    Socket client = server.accept();
    //向线程池中提交任务
    pool.execute(new ServerThread(client));
}
4.4、关闭连接,释放资源
if(server != null) {
    server.close();
}

if(pool != null) {
    pool.shutdown();
}
4.5、本类完整的代码为:
package com.xgp.company;

import java.io.IOException;
import java.net.ServerSocket;
import java.net.Socket;
import java.util.concurrent.ExecutorService;
import java.util.concurrent.Executors;

/**
 * 服务端
 * @author 薛国鹏
 */
public class MyHttpServer {
    public static void main(String[] args) {
        ServerSocket server = null;
        ExecutorService pool = null;
        try {
            //创建一个可伸缩的连接池
            pool = Executors.newCachedThreadPool();
            //启动服务器,监听8080端口
            server = new ServerSocket(80);
            System.out.println("服务器启动,当前端口为80");
            while (!Thread.interrupted()){
                //不停接收客户端请求
                Socket client = server.accept();
                //向线程池中提交任务
                pool.execute(new ServerThread(client));
            }
        }catch (Exception e) {
            throw new RuntimeException(e.getMessage() + "服务端异常");
        }finally {
            try {
                if(server != null) {
                    server.close();
                }

                if(pool != null) {
                    pool.shutdown();
                }
            } catch (IOException e) {
                e.printStackTrace();
            }
        }
    }
}
5、进行测试
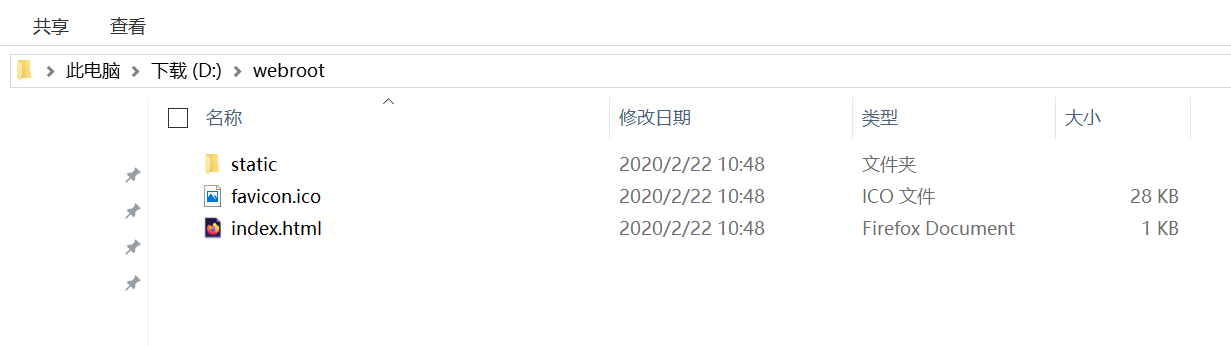
5.1、将测试的静态文件放在D:\webroot目录下,如图是一个使用Vue编写的一个静态的前端项目
5.2、启动自己编写的web服务器软件,看到控制台出现了"服务器启动,当前端口为80"则服务启动成功
5.3、输入域名,进行访问

调出浏览器控制台,看请求的资源是否正常解析:
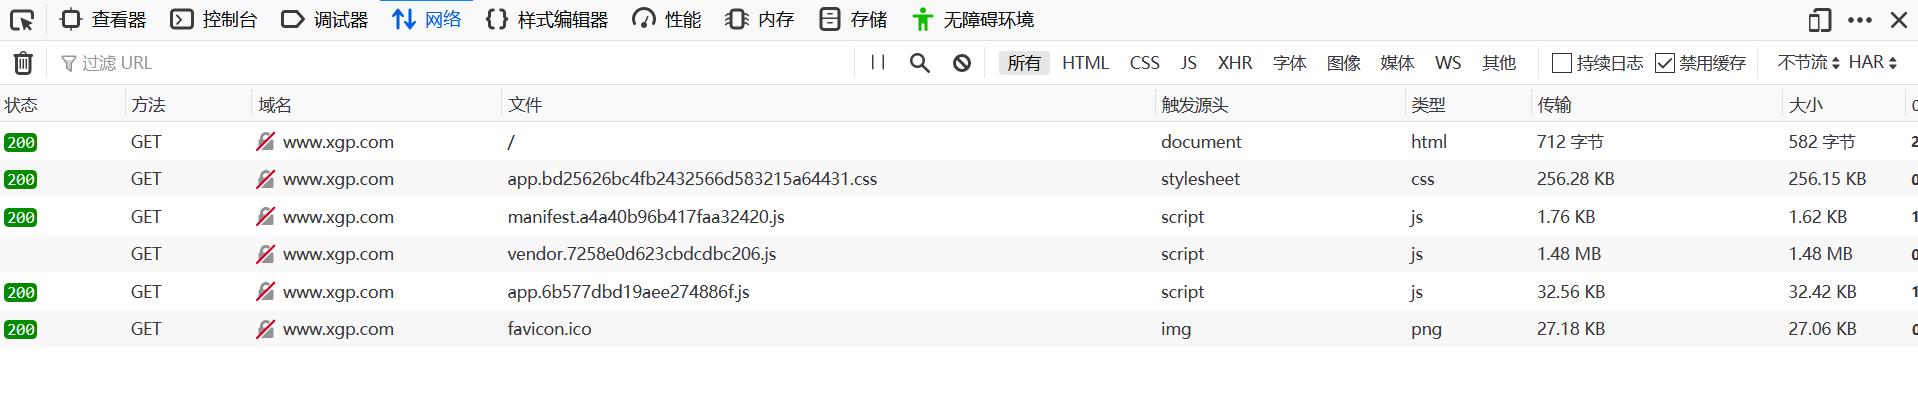
可以看到,页面正确渲染了,请求的资源也没有发生问题,因此我们自己编写的简陋版本的web服务器软件编写成功。
原文链接:https://www.cnblogs.com/xgp123/p/12345028.html
如有疑问请与原作者联系
标签:
版权申明:本站文章部分自网络,如有侵权,请联系:west999com@outlook.com
特别注意:本站所有转载文章言论不代表本站观点,本站所提供的摄影照片,插画,设计作品,如需使用,请与原作者联系,版权归原作者所有

- 国外程序员整理的Java资源大全(全部是干货) 2020-06-12
- 2020年深圳中国平安各部门Java中级面试真题合集(附答案) 2020-06-11
- 2020年java就业前景 2020-06-11
- 04.Java基础语法 2020-06-11
- Java--反射(框架设计的灵魂)案例 2020-06-11
IDC资讯: 主机资讯 注册资讯 托管资讯 vps资讯 网站建设
网站运营: 建站经验 策划盈利 搜索优化 网站推广 免费资源
网络编程: Asp.Net编程 Asp编程 Php编程 Xml编程 Access Mssql Mysql 其它
服务器技术: Web服务器 Ftp服务器 Mail服务器 Dns服务器 安全防护
软件技巧: 其它软件 Word Excel Powerpoint Ghost Vista QQ空间 QQ FlashGet 迅雷
网页制作: FrontPages Dreamweaver Javascript css photoshop fireworks Flash
