
Spring整合Junit
2020-04-02 16:04:45来源:博客园 阅读 ()

Spring整合Junit
一. 导入相关依赖
(1) junit依赖
    <dependency>
      <groupId>junit</groupId>
      <artifactId>junit</artifactId>
      <version>4.12</version>
      <scope>test</scope>
    </dependency>
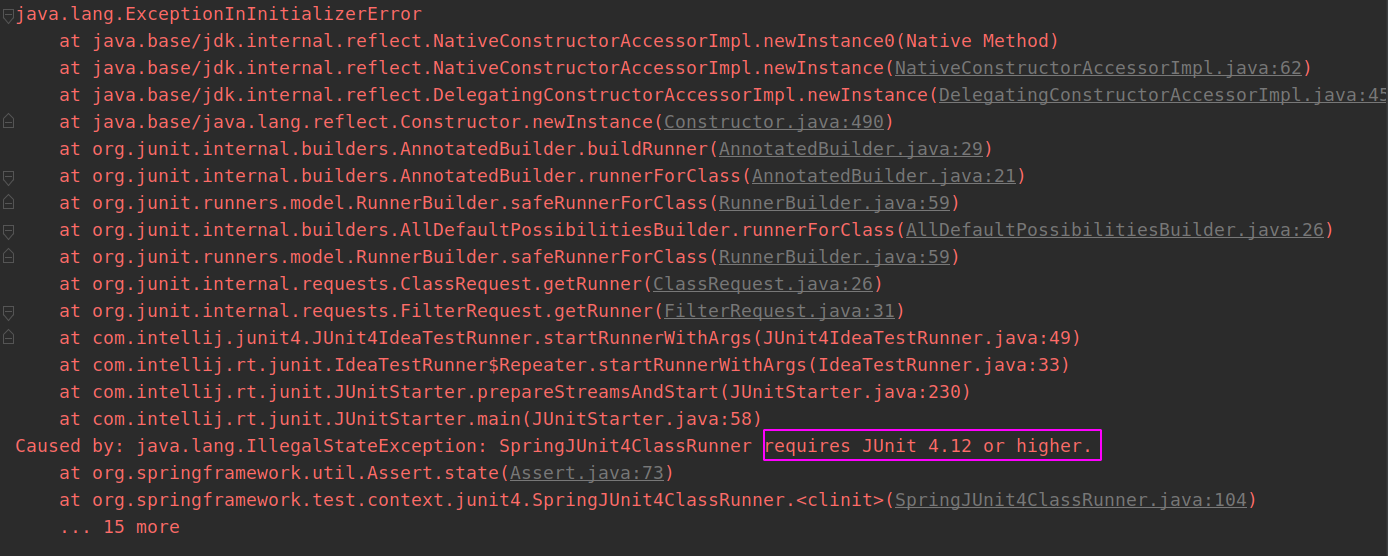
注:Spring 5.x 版本整合Junit时,Junit的版本要求必须在4.12及以上,否则会报错
(2)spring-test
    <!--Spring-test-->
    <!-- https://mvnrepository.com/artifact/org.springframework/spring-aspects -->
    <dependency>
      <groupId>org.springframework</groupId>
      <artifactId>spring-test</artifactId>
      <version>5.0.2.RELEASE</version>
    </dependency>
二. 添加注解
在测试类添加注解:
/**
	* RunWith注解:
	* 作用: 把原有的main方法替换成spring提供的main方法
	* 写法固定
	*/
@RunWith(SpringJUnit4ClassRunner.class)
/**
   * ContextConfiguration注解:
   * locations属性: 用于指定Spring配置文件的路径
   * classes属性: 用于指定注解类所在地的路径
   */
@ContextConfiguration(locations = {"classpath:applicationContext.xml"})
// 注解类写法:
//@ContextConfiguration(classes = SpringConfiguration.class)
public class MapperTest {
	//实现自动依赖注入
    @Autowired
    private DepartmentMapper departmentMapper;

    @Test
    public void testCRUD(){
        //使用依赖注入的对象
        System.out.println(departmentMapper);
    }
}
三.示例代码
@RunWith(SpringJUnit4ClassRunner.class)
@ContextConfiguration(locations = {"classpath:applicationContext.xml"})
public class MapperTest {
    @Autowired
    private DepartmentMapper departmentMapper;

    @Test
    public void testCRUD(){
        System.out.println(departmentMapper);
    }
}
原文链接:https://www.cnblogs.com/davidhsiang/p/12620671.html
如有疑问请与原作者联系
标签:
版权申明:本站文章部分自网络,如有侵权,请联系:west999com@outlook.com
特别注意:本站所有转载文章言论不代表本站观点,本站所提供的摄影照片,插画,设计作品,如需使用,请与原作者联系,版权归原作者所有

下一篇:java程序:转化金额
- Spring系列.ApplicationContext接口 2020-06-11
- springboot2配置JavaMelody与springMVC配置JavaMelody 2020-06-11
- 给你一份超详细 Spring Boot 知识清单 2020-06-11
- SpringBoot 2.3 整合最新版 ShardingJdbc + Druid + MyBatis 2020-06-11
- 掌握SpringBoot-2.3的容器探针:实战篇 2020-06-11
IDC资讯: 主机资讯 注册资讯 托管资讯 vps资讯 网站建设
网站运营: 建站经验 策划盈利 搜索优化 网站推广 免费资源
网络编程: Asp.Net编程 Asp编程 Php编程 Xml编程 Access Mssql Mysql 其它
服务器技术: Web服务器 Ftp服务器 Mail服务器 Dns服务器 安全防护
软件技巧: 其它软件 Word Excel Powerpoint Ghost Vista QQ空间 QQ FlashGet 迅雷
网页制作: FrontPages Dreamweaver Javascript css photoshop fireworks Flash
