
webpack初起步
2019-03-11 09:45:50来源:博客园 阅读 ()

webpack 用于编译 JavaScript 模块。一旦完成安装,就可以通过 webpack 的 CLI 或 API 与其配合交互。
首先创建一个目录,进入目录中,初始化npm 然后本地安装webpack,webpack-cli ,lodash


目录结构:

index.html
<!DOCTYPE html>
<html lang="en">
<head>
    <meta charset="UTF-8">
    <meta name="viewport" content="width=device-width, initial-scale=1.0">
    <meta http-equiv="X-UA-Compatible" content="ie=edge">
    <title>Document</title>
</head>
<body>
    <script src="bundle.js"></script>
</body>
</html>
webpack.config.js
const path = require('path');

module.exports = {
    entry: './src/index.js',
    output:{
        filename: 'bundle.js',
        path: path.resolve(__dirname, 'dist')
    }
}
package,json
{
  "name": "webpack-demo",
  "version": "1.0.0",
  "description": "",
  "private": true,
  "scripts": {
    "test": "echo \"Error: no test specified\" && exit 1",
    "build": "webpack"
  },
  "keywords": [],
  "author": "",
  "license": "ISC",
  "devDependencies": {
    "webpack": "^4.29.6",
    "webpack-cli": "^3.2.3"
  },
  "dependencies": {
    "lodash": "^4.17.11"
  }
}
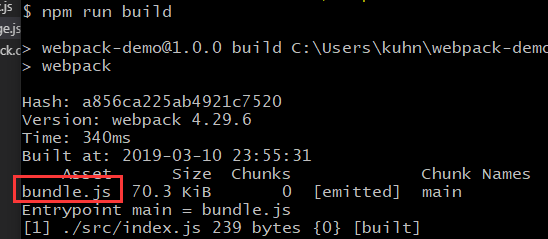
输入npm run build

原文链接:https://www.cnblogs.com/kuhnTseng/p/10508162.html
如有疑问请与原作者联系
标签:
版权申明:本站文章部分自网络,如有侵权,请联系:west999com@outlook.com
特别注意:本站所有转载文章言论不代表本站观点,本站所提供的摄影照片,插画,设计作品,如需使用,请与原作者联系,版权归原作者所有

- webpack打包配置禁止html标签全部转为小写 2019-08-14
- 入门webpack,看这篇就够了 2019-08-14
- image-webpack-loader包安装报错解决 2019-08-14
- Vue学习之webpack中使用vue(十七) 2019-08-14
- Vue学习之webpack调用第三方loader(十五) 2019-08-14
IDC资讯: 主机资讯 注册资讯 托管资讯 vps资讯 网站建设
网站运营: 建站经验 策划盈利 搜索优化 网站推广 免费资源
网络编程: Asp.Net编程 Asp编程 Php编程 Xml编程 Access Mssql Mysql 其它
服务器技术: Web服务器 Ftp服务器 Mail服务器 Dns服务器 安全防护
软件技巧: 其它软件 Word Excel Powerpoint Ghost Vista QQ空间 QQ FlashGet 迅雷
网页制作: FrontPages Dreamweaver Javascript css photoshop fireworks Flash
