
MixPanel:Android 端埋点技术研究
2018-07-13 08:59:11来源:编程学习网 阅读 ()


前言
目前在 app 上通过记录用户操作(俗称埋点),来分析用户行为的做法,已经成了 app 必不可少的一部分。有关 app 的埋点技术,也在发展中。正好最近项目组研发了一个埋点的 sdk,所以把相关知识梳理下。
埋点方式
1、代码埋点
这种方式主要是由程序猿们手动在代码中的回调事件里加上埋点代码。优点是高度定制,想怎么埋怎么埋,缺点是工作量大,而且易出错,难维护。
2、可视化埋点
这种埋点方式分为两种,一是使用后台界面配置需要埋点的位置,app下载配置文件,将需要埋点的事件上传(代表 MixPanel,百度,talkingdata等)。二是app把所有事件上传,后台自己选择需要埋点的点(代表heap)。
两种埋点方式各有优劣,但是由于技术目前还在发展中,并没有形成完全统一的理论以及方式,因此现在大多是这两种方式并存。
参考文献: http://blog.csdn.net/vshuang/article/details/60361314
MixPanel源码分析-Android
下面是分析 MixPanel 的源码,这应该是唯一的开源的商业埋点实现(其他我没找到),提供可视化埋点以及代码埋点方式。开源地址: https://github.com/mixpanel ,我主要是研究 Android 的代码。
本文的分析并不透彻,主要由于 mixpanel 的代码比较复杂,很多是和服务器的交互,在不了解协议的情况下,我也是连蒙带猜来看源码的。想透彻分析的同学,可以在 mixpanel 的网站上注册一个应用,再在应用里集成 mixpanel 的源码,然后加日志或者 debug 来分析。由于时间有限,我并没有这么做。请见谅。
首先是 mixpanel 的入口,MixPanelApi
该类中有大量的方法叫做 Tweak,这个是用来做 abtest 的,在服务器上做相应的配置,客户端可以拉取配置实现不同的功能。本文不讨论这个。
主要方法就是 track,
/**
 * Track an event.
 *
 * <p>Every call to track eventually results in a data point sent to Mixpanel. These data points
 * are what are measured, counted, and broken down to create your Mixpanel reports. Events
 * have a string name, and an optional set of name/value pairs that describe the properties of
 * that event.
 *
 * @param eventName The name of the event to send
 * @param properties A JSONObject containing the key value pairs of the properties to include in this event.
 *                   Pass null if no extra properties exist.
 */
public void track(String eventName, JSONObject properties) {
    track(eventName, properties, false);
}
我们通过不停跟踪代码发现,这个方法会把埋点的 event,生成一个AnalyticsMessages.EventDescription 对象,然后通过 handler,发送到后台线程中去处理,代码如下
track(){
  final AnalyticsMessages.EventDescription eventDescription =
    new AnalyticsMessages.EventDescription(eventName, messageProps, mToken, isAutomaticEvent);
  mMessages.eventsMessage(eventDescription);
}
// ...跳转至eventsMessage
public void eventsMessage(final EventDescription eventDescription) {
        final Message m = Message.obtain();
        m.what = ENQUEUE_EVENTS;
        m.obj = eventDescription;
        mWorker.runMessage(m);
}
//消息处理
if (msg.what == ENQUEUE_EVENTS) {
  final EventDescription eventDescription = (EventDescription) msg.obj;
  try {
    //省略部分代码
    returnCode = mDbAdapter.addJSON(message, token, MPDbAdapter.Table.EVENTS, eventDescription.isAutomatic());
  } catch (final JSONException e) {
    MPLog.e(LOGTAG, "Exception tracking event " + eventDescription.getEventName(), e);
  }
}
可以看到,最终数据被存储到了数据库里,具体的数据库表结构大家可以自行看源码,我就不研究哦了。
那数据什么时候上传呢,主要是在 activiyt 的 onPause 之后上传。
@Override
public void onActivityPaused(final Activity activity) {
    mPaused = true;
    if (check != null) {
        mHandler.removeCallbacks(check);
    }
    mHandler.postDelayed(check = new Runnable(){
        @Override
        public void run() {
            if (mIsForeground && mPaused) {
                mIsForeground = false;
                try {
                    double sessionLength = System.currentTimeMillis() - sStartSessionTime;
                    if (sessionLength >= mConfig.getMinimumSessionDuration() && sessionLength < mConfig.getSessionTimeoutDuration()) {
                        DecimalFormat df = new DecimalFormat("#.0");
                        String sessionLengthString = df.format((System.currentTimeMillis() - sStartSessionTime) / 1000);
                        JSONObject sessionProperties = new JSONObject();
                        sessionProperties.put(AutomaticEvents.SESSION_LENGTH, sessionLengthString);
                        mMpInstance.track(AutomaticEvents.SESSION, sessionProperties, true);
                    }
                } catch (JSONException e) {
                    e.printStackTrace();
                }
                mMpInstance.flush(); //上传
            }
        }
    }, CHECK_DELAY);
}
用户也可以通过 MixPanelApi 的 flush 方法上传
public void flush() {
    mMessages.postToServer(new AnalyticsMessages.FlushDescription(mToken));
}
这就是事件埋点的基本流程,当然功能不止这些,还可以通过 activity 的生命周期,记录页面停留时长等,这些都是基于这个基本流程来处理的。
可视化埋点
我觉得埋点主要的难点就是在可视化埋点上,如何做到良好的用户体验以及性能呢。我们一起来看看 MixPanel 是怎么做的。
首先看一下官网的介绍 https://mixpanel.com/autotrack/
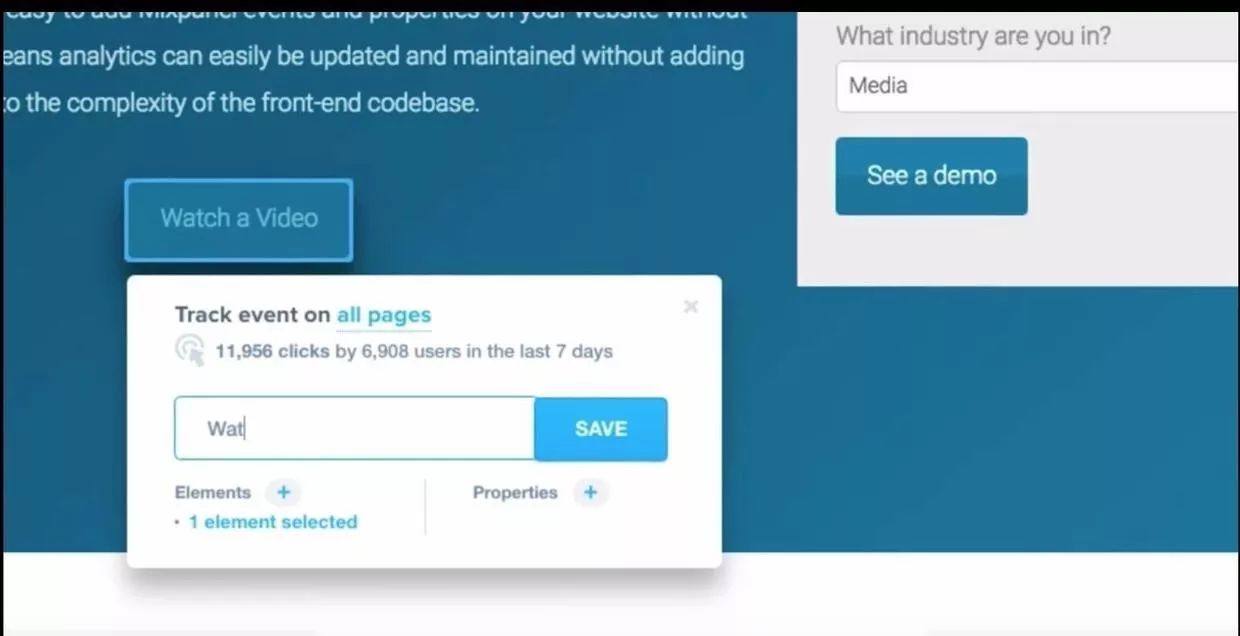
通过视频可以看到,网页后台可以找到我们所有可以埋点的区域,该区域会高亮+边框显示出来,点击该区域,就会显示弹出一个对话框,就可以把这个区域射成一个埋点的位置。
这看起来是不是比代码埋点好多啦。那服务器是怎么找到 app 中可以埋点的位置的呢。我们来看一下源码,首先是连接上配置界面的地方,是通过 websocket 连接的,mixpanel 继承了大量 websocket 的实现,这里我们就不管他了,感兴趣的同学可以去自己研究下 websocket 的开源实现。具体处理协议的地方是 EditorClient 这个类
private class EditorClient extends WebSocketClient {
    public EditorClient(URI uri, int connectTimeout, Socket sslSocket) throws InterruptedException {
        super(uri, new Draft_17(), null, connectTimeout);
        setSocket(sslSocket);
    }
    @Override
    public void onOpen(ServerHandshake handshakedata) {
        MPLog.v(LOGTAG, "Websocket connected");
    }
    @Override
    public void onMessage(String message) {
        MPLog.v(LOGTAG, "Received message from editor:\n" + message);
        try {
            final JSONObject messageJson = new JSONObject(message);
            final String type = messageJson.getString("type");
            if (type.equals("device_info_request")) {
                mService.sendDeviceInfo();
            } else if (type.equals("snapshot_request")) {
                mService.sendSnapshot(messageJson);
            } else if (type.equals("change_request")) {
                mService.performEdit(messageJson);
            } else if (type.equals("event_binding_request")) {
                mService.bindEvents(messageJson);
            } else if (type.equals("clear_request")) {
                mService.clearEdits(messageJson);
            } else if (type.equals("tweak_request")) {
                mService.setTweaks(messageJson);
            }
        } catch (final JSONException e) {
            MPLog.e(LOGTAG, "Bad JSON received:" + message, e);
        }
    }
可以看到 OnMessage 的地方有这么几个接口。这些都是后台 web 页面发过来的消息,然后 app 端执行相应的操作。
device_info_request 这个就不说了,显然是获取一些设备的信息。
snapshot_request 这个就是关键的地方,这里是 app 端将当前展示的页面的截图,发送给后端,这样后端就可以显示出来了。我们通过代码跟踪,找到了实现在 ViewCrawler 里的 sendSnapshot 方法。
private void sendSnapshot(JSONObject message) {
    final long startSnapshot = System.currentTimeMillis();
    //...省略
    try {
        writer.write("{");
        writer.write("\"type\": \"snapshot_response\",");
        writer.write("\"payload\": {");
        {
            writer.write("\"activities\":");
            writer.flush();
            mSnapshot.snapshots(mEditState, out);
        }
        final long snapshotTime = System.currentTimeMillis() - startSnapshot;
        writer.write(",\"snapshot_time_millis\": ");
        writer.write(Long.toString(snapshotTime));
        writer.write("}"); // } payload
        writer.write("}"); // } whole message
    } catch (final IOException e) {
        MPLog.e(LOGTAG, "Can't write snapshot request to server", e);
    } finally {
        try {
            writer.close();
        } catch (final IOException e) {
            MPLog.e(LOGTAG, "Can't close writer.", e);
        }
    }
}
关键代码在 ViewSnapShot 里
/**
 * Take a snapshot of each activity in liveActivities. The given UIThreadSet will be accessed
 * on the main UI thread, and should contain a set with elements for every activity to be
 * snapshotted. Given stream out will be written on the calling thread.
 */
public void snapshots(UIThreadSet<Activity> liveActivities, OutputStream out) throws IOException {
    mRootViewFinder.findInActivities(liveActivities);
    final FutureTask<List<RootViewInfo>> infoFuture = new FutureTask<List<RootViewInfo>>(mRootViewFinder);
    mMainThreadHandler.post(infoFuture);
    final OutputStreamWriter writer = new OutputStreamWriter(out);
    List<RootViewInfo> infoList = Collections.<RootViewInfo>emptyList();
    writer.write("[");
    try {
        infoList = infoFuture.get(1, TimeUnit.SECONDS);
    } catch (final InterruptedException e) {
        MPLog.d(LOGTAG, "Screenshot interrupted, no screenshot will be sent.", e);
    } catch (final TimeoutException e) {
        MPLog.i(LOGTAG, "Screenshot took more than 1 second to be scheduled and executed. No screenshot will be sent.", e);
    } catch (final ExecutionException e) {
        MPLog.e(LOGTAG, "Exception thrown during screenshot attempt", e);
    }
RootViewInfo 是一个 Future,主要的方法是 taskSnapShot
private void takeScreenshot(final RootViewInfo info) {
    final View rootView = info.rootView;
    Bitmap rawBitmap = null;
    try {
        final Method createSnapshot = View.class.getDeclaredMethod("createSnapshot", Bitmap.Config.class, Integer.TYPE, Boolean.TYPE);
        createSnapshot.setAccessible(true);
        rawBitmap = (Bitmap) createSnapshot.invoke(rootView, Bitmap.Config.RGB_565, Color.WHITE, false);
    } catch (final NoSuchMethodException e) {
        MPLog.v(LOGTAG, "Can't call createSnapshot, will use drawCache", e);
    } catch (final IllegalArgumentException e) {
        MPLog.d(LOGTAG, "Can't call createSnapshot with arguments", e);
    } catch (final InvocationTargetException e) {
        MPLog.e(LOGTAG, "Exception when calling createSnapshot", e);
    } catch (final IllegalAccessException e) {
        MPLog.e(LOGTAG, "Can't access createSnapshot, using drawCache", e);
    } catch (final ClassCastException e) {
        MPLog.e(LOGTAG, "createSnapshot didn't return a bitmap?", e);
    }
    Boolean originalCacheState = null;
    try {
        if (null == rawBitmap) {
            originalCacheState = rootView.isDrawingCacheEnabled();
            rootView.setDrawingCacheEnabled(true);
            rootView.buildDrawingCache(true);
            rawBitmap = rootView.getDrawingCache();
        }
    } catch (final RuntimeException e) {
        MPLog.v(LOGTAG, "Can't take a bitmap snapshot of view " + rootView + ", skipping for now.", e);
    }
    float scale = 1.0f;
    if (null != rawBitmap) {
        final int rawDensity = rawBitmap.getDensity();
        if (rawDensity != Bitmap.DENSITY_NONE) {
            scale = ((float) mClientDensity) / rawDensity;
        }
        final int rawWidth = rawBitmap.getWidth();
        final int rawHeight = rawBitmap.getHeight();
        final int destWidth = (int) ((rawBitmap.getWidth() * scale) + 0.5);
        final int destHeight = (int) ((rawBitmap.getHeight() * scale) + 0.5);
        if (rawWidth > 0 && rawHeight > 0 && destWidth > 0 && destHeight > 0) {
            mCachedBitmap.recreate(destWidth, destHeight, mClientDensity, rawBitmap);
        }
    }
    if (null != originalCacheState && !originalCacheState) {
        rootView.setDrawingCacheEnabled(false);
    }
    info.scale = scale;
    info.screenshot = mCachedBitmap;
}
这里就知道了,首先通过反射 view 的 createSnapshot 方法,尝试获取view的截图,如果没有成功,则调用截屏的api,来获取Drawingcache。获取到之后,根据当前手机屏幕的分辨率来缩放一次。保证跟手机的分辨率一致。再上传给服务器,当然这里只是屏幕的截图,只根据截图,是无法知道控件点击位置的。然后又做了什么呢,我们继续看代码:
private void snapshotView(JsonWriter j, View view)
            throws IOException {
        final int viewId = view.getId();
        final String viewIdName;
        if (-1 == viewId) {
            viewIdName = null;
        } else {
            viewIdName = mResourceIds.nameForId(viewId);
        }
        j.beginObject();
        j.name("hashCode").value(view.hashCode());
        j.name("id").value(viewId);
        j.name("mp_id_name").value(viewIdName);
        final CharSequence description = view.getContentDescription();
        if (null == description) {
            j.name("contentDescription").nullValue();
        } else {
            j.name("contentDescription").value(description.toString());
        }
        final Object tag = view.getTag();
        if (null == tag) {
            j.name("tag").nullValue();
        } else if (tag instanceof CharSequence) {
            j.name("tag").value(tag.toString());
        }
        j.name("top").value(view.getTop());
        j.name("left").value(view.getLeft());
        j.name("width").value(view.getWidth());
        j.name("height").value(view.getHeight());
        j.name("scrollX").value(view.getScrollX());
        j.name("scrollY").value(view.getScrollY());
        j.name("visibility").value(view.getVisibility());
        float translationX = 0;
        float translationY = 0;
        if (Build.VERSION.SDK_INT >= 11) {
            translationX = view.getTranslationX();
            translationY = view.getTranslationY();
        }
        j.name("translationX").value(translationX);
        j.name("translationY").value(translationY);
        j.name("classes");
        j.beginArray();
       // ..省略部分
        if (view instanceof ViewGroup) {
            final ViewGroup group = (ViewGroup) view;
            final int childCount = group.getChildCount();
            for (int i = 0; i < childCount; i++) {
                final View child = group.getChildAt(i);
                // child can be null when views are getting disposed.
                if (null != child) {
                    snapshotView(j, child);
                }
            }
        }
    }
这里就是关键,通过遍历当前 view,将所有的 view 的信息,都传给了后端,尤其是 top,left,width,height 这些信息,通过这些信息,后端就可以确定 view 的位置。这里我觉得是有优化空间的,完全可以只上传可以被埋点的 view,例如 button 等,像一些纯展示的无法点击的view,其实没必要上传的。例如大部分 textview。这样增加了后端的负担。
当在后台操作,选择了一个点击的 view 之后,app 端就会收到event_binding_request 消息,我们来看看如何处理这个消息的
final int size = mEditorEventBindings.size();
for (int i = 0; i < size; i++) {
    final Pair<String, JSONObject> changeInfo = mEditorEventBindings.get(i);
    try {
        final ViewVisitor visitor = mProtocol.readEventBinding(changeInfo.second, mDynamicEventTracker);
        newVisitors.add(new Pair<String, ViewVisitor>(changeInfo.first, visitor));
    } catch (final EditProtocol.InapplicableInstructionsException e) {
        MPLog.i(LOGTAG, e.getMessage());
    } catch (final EditProtocol.BadInstructionsException e) {
        MPLog.e(LOGTAG, "Bad editor event binding cannot be applied.", e);
    }
}
首先调用 readEventBinding 读取服务端发来的信息,然后将它存在一个ViewVisitor 里,想找到具体的 view,则需要识别 view 的一些基本的特征,之前的代码已经看到了,view 的 id,tag,contentdescription 等特征,都已经被上传至服务器,这时服务器又会把它下发回来,放在 path 参数里。
// Package access FOR TESTING ONLY
/* package */ List<Pathfinder.PathElement> readPath(JSONArray pathDesc, ResourceIds idNameToId) throws JSONException {
    final List<Pathfinder.PathElement> path = new ArrayList<Pathfinder.PathElement>();
    for (int i = 0; i < pathDesc.length(); i++) {
        final JSONObject targetView = pathDesc.getJSONObject(i);
        final String prefixCode = JSONUtils.optionalStringKey(targetView, "prefix");
        final String targetViewClass = JSONUtils.optionalStringKey(targetView, "view_class");
        final int targetIndex = targetView.optInt("index", -1);
        final String targetDescription = JSONUtils.optionalStringKey(targetView, "contentDescription");
        final int targetExplicitId = targetView.optInt("id", -1);
        final String targetIdName = JSONUtils.optionalStringKey(targetView, "mp_id_name");
        final String targetTag = JSONUtils.optionalStringKey(targetView, "tag");
        final int prefix;
        if ("shortest".equals(prefixCode)) {
            prefix = Pathfinder.PathElement.SHORTEST_PREFIX;
        } else if (null == prefixCode) {
            prefix = Pathfinder.PathElement.ZERO_LENGTH_PREFIX;
        } else {
            MPLog.w(LOGTAG, "Unrecognized prefix type \"" + prefixCode + "\". No views will be matched");
            return NEVER_MATCH_PATH;
        }
        final int targetId;
        final Integer targetIdOrNull = reconcileIds(targetExplicitId, targetIdName, idNameToId);
        if (null == targetIdOrNull) {
            return NEVER_MATCH_PATH;
        } else {
            targetId = targetIdOrNull.intValue();
        }
        path.add(new Pathfinder.PathElement(prefix, targetViewClass, targetIndex, targetId, targetDescription, targetTag));
    }
    return path;
}
通过这些参数,就可以找个那个 view,继而对 view 进行监听,监听的方式就比较简单了,用谷歌提供的 Accessibility 相关 api 就可以做到。
if ("click".equals(eventType)) {
    return new ViewVisitor.AddAccessibilityEventVisitor(
        path,
        AccessibilityEvent.TYPE_VIEW_CLICKED,
        eventName,
        listener
    );
} else if ("selected".equals(eventType)) {
    return new ViewVisitor.AddAccessibilityEventVisitor(
        path,
        AccessibilityEvent.TYPE_VIEW_SELECTED,
        eventName,
        listener
    );
} else if ("text_changed".equals(eventType)) {
    return new ViewVisitor.AddTextChangeListener(path, eventName, listener);
} else if ("detected".equals(eventType)) {
    return new ViewVisitor.ViewDetectorVisitor(path, eventName, listener);
} else {
    throw new BadInstructionsException("Mixpanel can't track event type \"" + eventType + "\"");
}
而匹配 view 的规则也很简单,就是对比 class,id,contentDescription,tag 四个元素
private boolean matches(PathElement matchElement, View subject) {
    if (null != matchElement.viewClassName &&
            !hasClassName(subject, matchElement.viewClassName)) {
        return false;
    }
    if (-1 != matchElement.viewId && subject.getId() != matchElement.viewId) {
        return false;
    }
    if (null != matchElement.contentDescription &&
            !matchElement.contentDescription.equals(subject.getContentDescription())) {
        return false;
    }
    final String matchTag = matchElement.tag;
    if (null != matchElement.tag) {
        final Object subjectTag = subject.getTag();
        if (null == subjectTag || !matchTag.equals(subject.getTag().toString())) {
            return false;
        }
    }
    return true;
}
这样,在每次 app 的 activity 的 onresume 方法里,都会去做这个寻找匹配的 view 的过程,具体看 viewcrawler 的 onActivityResume 方法
@Override //ViewCrawler.class
public void onActivityResumed(Activity activity) {
    installConnectionSensor(activity);
    mEditState.add(activity);
}
//通过一系列处理,最终调用了visit方法
/**
     * Scans the View hierarchy below rootView, applying it's operation to each matching child view.
     */
public void visit(View rootView) {
  Log.d(LOGTAG, mPath.get(0).toString());
  mPathfinder.findTargetsInRoot(rootView, mPath, this);
}
这种做法的效率暂且不停,到这里我们的流程就分析完了。大致的流程就是
App 端 上传屏幕截图和页面布局信息-》服务端操作之后,下发需要埋点的 viewpath -》 app 端存储这个 path,并在每个 activity 的 onResume 都去执行寻找 path 的任务-》注册 Accessibility 监听,上传相应事件。
这样就实现了可视化埋点,但是这种方式,应该是用于已经发布到线上的app 的埋点,而且不同版本不通用。。。因为 view 的 id 等信息是会随着版本变化的。如果这里有错误,请大神指出。不胜感激,谢谢!!
来自:http://mp.weixin.qq.com/s/uzvzF2owmw_g5vP-Np7x5w
标签:
版权申明:本站文章部分自网络,如有侵权,请联系:west999com@outlook.com
特别注意:本站所有转载文章言论不代表本站观点,本站所提供的摄影照片,插画,设计作品,如需使用,请与原作者联系,版权归原作者所有

- Android内存溢出OOM:常见内存泄漏 2018-07-13
- Android开源:AndLinker-Android 上的 IPC 库 2018-07-13
- 最全面Android 导航模式解析 2018-07-13
- Android的延迟实现的几种解决方案以及原理分析 2018-07-13
- Android换肤原理和Android-Skin-Loader框架解析 2018-07-13
IDC资讯: 主机资讯 注册资讯 托管资讯 vps资讯 网站建设
网站运营: 建站经验 策划盈利 搜索优化 网站推广 免费资源
网络编程: Asp.Net编程 Asp编程 Php编程 Xml编程 Access Mssql Mysql 其它
服务器技术: Web服务器 Ftp服务器 Mail服务器 Dns服务器 安全防护
软件技巧: 其它软件 Word Excel Powerpoint Ghost Vista QQ空间 QQ FlashGet 迅雷
网页制作: FrontPages Dreamweaver Javascript css photoshop fireworks Flash
